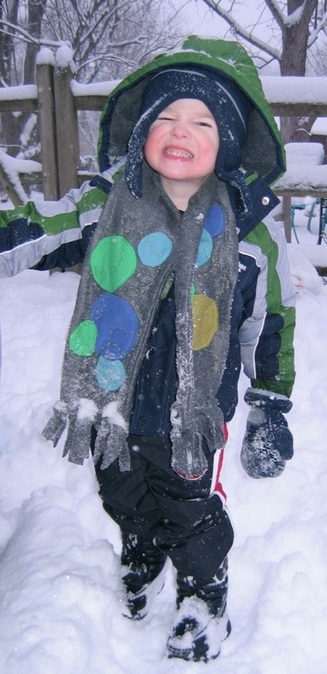
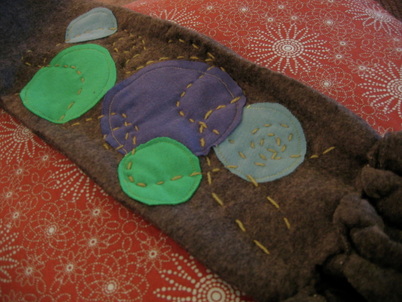
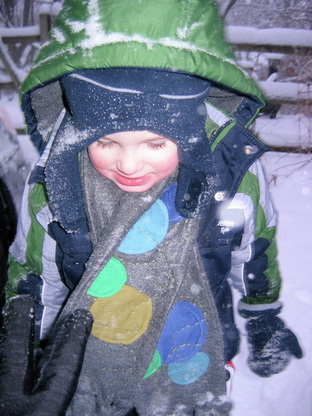
I don’t like winter, but I live in Cincinnati. So I’m pretty much out of luck. The only good thing about winter is the clothes—layers of fleecy, wooly, tweedy warmth. We bought Max his first real big boy winter coat a few months ago, along with hats, gloves, and boots. But it never occurred to me to get a scarf for him. So when I spotted this piece of grey fleece in my sewing basket one impossibly cold Sunday morning, I knew exactly what to do with it. The circles remind me of blowing bubbles, and I picked colors that would match his coat. I used all knit fabric, but you could use whatever is on hand (I actually think using a woven cotton and then fraying the edges would look really great).
You could probably look at this and figure out intuitively how to do it. But here are the basic steps in case you want to know how I did it.
1. First, cut two pieces of fleece, each about 46 inches by 6-1/2 inches (or whatever length you want the scarf—I wanted some definite length).
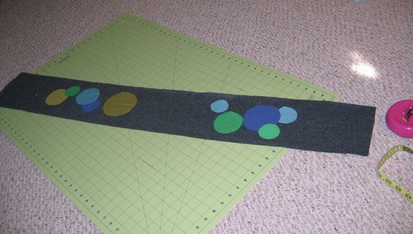
2. Next, cut out a bunch of circles of different sizes and in different colors (trace whatever you have on hand to create circles).
3. Arrange your circles on the scarf front; keep at least 1/2-inch on each side (room for seams) and about six inches at each bottom (for the fringe).
4. To appliqué, you can use Wonder-Under. I think my Wonder-Under was too old (and ruined from spending the summer in my hot attic office), so instead, I just dabbed some fabric glue to hold the circles until I stitched.
5. I sewed around the circles with a basic straight stitch, because I wanted a rough, uneven look. But you could also do a zigzag or appliqué stitch. Or if you want a clean-edged look, follow Anna Maria Horner’s directions for super circles.
6. Sew up the sides of your two pieces of fleece (right sides together). Leave both ends open.
7. Turn and press well. 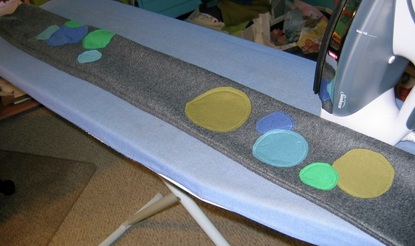
Don't forget to press after you turn so the scarf's side edges are nice and crisp. Ignore all of the crap in the background, please.
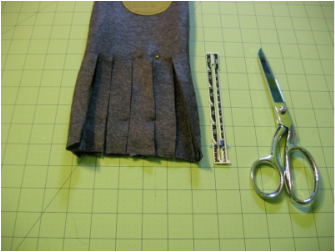
8. Align the rough edges at the ends and make four or five cuts about 5 - 6 inches deep, about 1 to 1-1/2 inches apart.
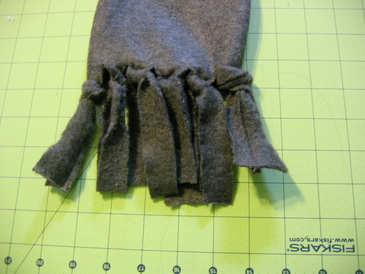
9. Tie the ends together to make fringe. Trimming the seam will help the end piece be less bulky. Don’t pull it too tight because it’s easy to stretch. My fringe is never perfect, so I just trim it until it’s even. (I’m sure there are more exacting ways to do this, but it’s for a wild toddler in the snow, so I’m not too worried.)
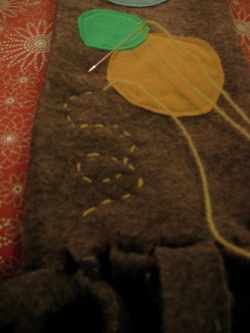
10. Add stitching detail. The stitching detail on the outside is actually my favorite part of this scarf! Last year, I won some pretty green yarn at Purl Soho (I was lucky enough to be there the day of their grand re-opening). I wasn’t sure what to do with it until I was trying to figure out how to add some more personality to this scarf. I decided to pull apart the strands and use a single strand (you pretty much have to use a needle threader to get it to go through the eye of an embroidery needle). I just freehanded the fun, curling stitches. (I’m not that great of a hand sewer, and it’s actually very easy to do.)
The hand-stitching looks good, and it holds the layers together. You could freehand some machine stitching of course, too.
May your winter be toasty!



 RSS Feed