Bonus Projects
Easy-as-Pie Lined Drawstring Bag
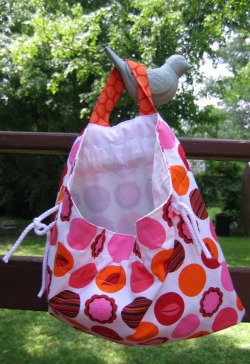
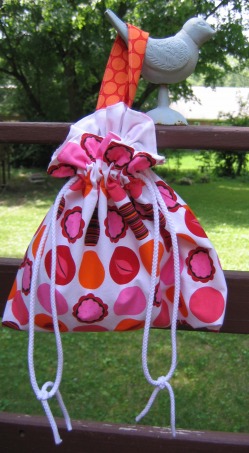
I blogged recently about this drawstring bag. I discovered by accident that it was easier to line the bag, versus making it unlined with a casing. And I do love the smooth, clean interior of a lined bag! This one is just a medium size (finished size is about 12 inches high by 14 inches wide) but you can adjust the size accordingly. You’ll need to make buttonholes for the cording to slide through, but it’s really quite simple. I also added a tab for hanging the bag (so you don’t have to hang it up by the cording). Make the tab out of the same fabric, or a fun coordinating print.
What You Need
- 1/2 yard of fabric for bag front
- 1/2 yard of fabric for lining
- Scrap of coordinating fabric for tab (to hang bag)
- 1-1/2 to 2 yards of cording or ribbon
Choosing Fabric
The basic directions that have you fold the fabric don’t work as well for one-way prints (a print that runs one way along the selvedge), unless you don’t care if the print is sideways (versus up and down). You’ll need to re-orient the fabric and cut your length of the bag along the selvedge. But instead of folding, you’ll want to cut a front piece and a back piece, so both front and back are running the same way (if you cut one big rectangle and fold it, the pattern will wind up running one way on one side and the other way on the other side).
The basic directions that have you fold the fabric don’t work as well for one-way prints (a print that runs one way along the selvedge), unless you don’t care if the print is sideways (versus up and down). You’ll need to re-orient the fabric and cut your length of the bag along the selvedge. But instead of folding, you’ll want to cut a front piece and a back piece, so both front and back are running the same way (if you cut one big rectangle and fold it, the pattern will wind up running one way on one side and the other way on the other side).
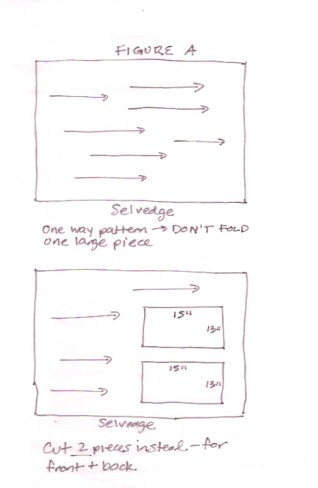
FIGURE A
What to Cut
Assemble
- If your pattern is an all-over pattern (or solid) and suitable for folding, cut a 25-inch by 15-inch rectangle from both your main fabric and your lining fabric
- If you have a one-way print, then cut two 13-inch by 15-inch rectangles from main fabric (refer to Figure A). If your lining is also a one-way print, then do the same (but if it’s not, you can just cut the large rectangle and fold).
- For tab: Cut a 3-1/2-inch by 11-inch rectangle
Assemble
- With wrong side facing you, press the short ends of all pieces (main fabric and lining) down 1/4-inch (if you have a front and a back piece, then just press one short edge on each piece, and that will become your top).
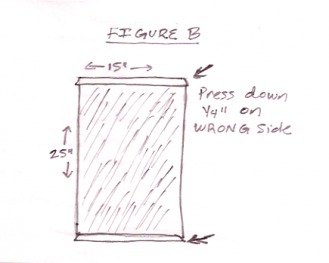
FIGURE B
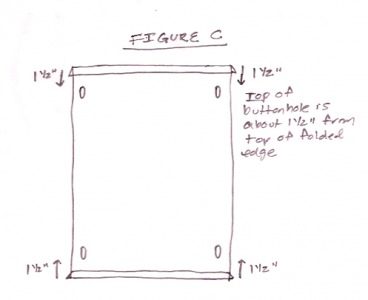
FIGURE C
- Make buttonholes: You’ll need to make four buttonholes (for either version of the bag) on just the main fabric (not the lining). For the folded version of the bag, your four buttonholes will be near each corner of the large rectangle. For the bottom-seamed bag, you’ll have two buttonholes on the front piece, and two on the back piece. The measurements are the same either way.
- Your buttonholes should each be about one inch away from the side edge. Measure down 1-1/2 inches from the top (folded) edge. This will be the TOP of your buttonhole. Make your buttonhole about an inch long.
- After you make your buttonholes, cut them open.
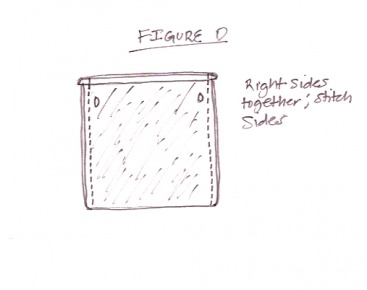
- Fold your main fabric piece in half, right sides together, and pin. (The buttonholes should align pretty closely, but it doesn’t have to be perfect, so don’t stress). Stitch up the sides; stitch all the way through the folded top edge. (Or, pin front and back piece together, and stitch all the way around both sides and bottom).
- Press seams open as far as you can. Turn right-side out.
- Fold lining and stitch in the same way. Remember, your lining doesn’t have any buttonholes in it.
- Press open seams of lining, but DON’T TURN right-side out.
- Insert the lining into the bag, aligning the top folded edges. Pin.
- To make your tab: with wrong side facing you, press each long side under 1/2-inch.
- Fold piece in half, wrong sides together, and press.
- Top-stitch the folded edges together. Leave short ends raw.
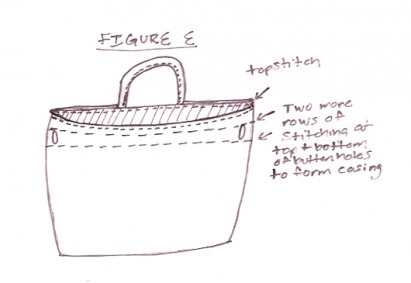
FIGURE E
- Find the center, and then stick the raw edges of your tab piece in between the layers of your top folded edges (the piece you put your tab on becomes the back of the bag). Pin to secure.
- Stitch all the way around the top of the bag, very close to the folded edge. This secures your tab piece too.
- To make your lines of stitching that form the casing: measure down about 1-1/2 inches. This should be just at the top of your buttonholes (if it isn’t, then adjust your stitching line to be at the top of buttonholes); stitch all the way around. This forms the top of your casing.
- To form the bottom of your casing, measure down about another inch (or however long your made your buttonholes) and stitch all the way around. You want all of your buttonholes in the middle of those lines of stitching.
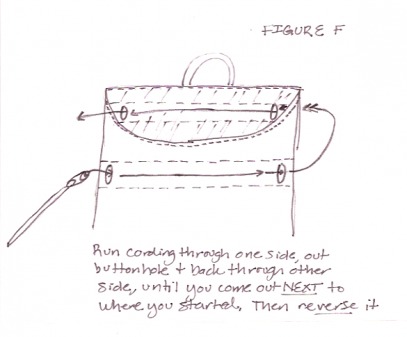
FIGURE F
- To make the drawstring: I used about a 22-inch piece of drawstring, but you may want it longer or shorter. I suggest not cutting it yet (just work with whatever length you brought home from fabric store). Stick a safety pin on one end of the cording and push it through one buttonhole, all along the casing. Run it through until it comes out the buttonhole on the opposite end, and then push it on through the next buttonhole on the other side, until it comes out the buttonhole that’s right next to the one you started with.
- Leave your drawstring pieces fairly long at first—definitely enough to knot. You can always shorten.
- Repeat this same process, but start at the OPPOSITE end this time.
- Tidy up your drawstring ends (I usually tape the ends so they don’t fray), and tie knots. Now, you have a bag that will cinch up when you tug at each end of the drawstring.