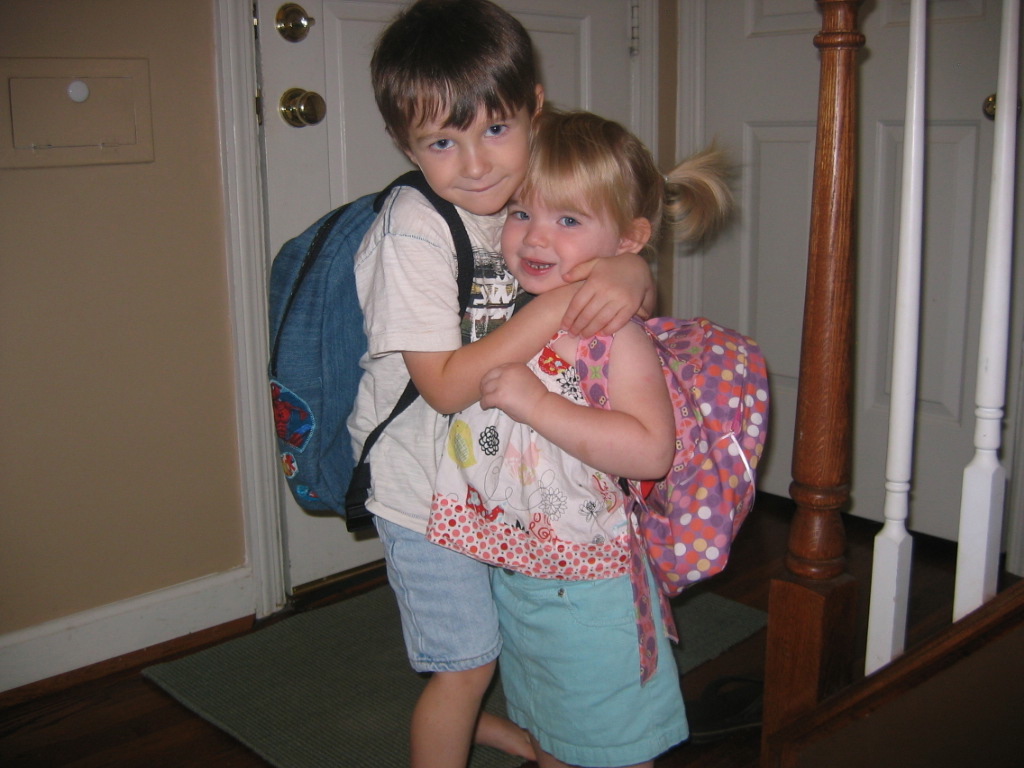
Back to school: what a sweet phrase that is! Max heads back to preschool (Pre-K, to be exact) and his little sister, Georgia, heads to a toddler program. Even though it’s been an insanely busy summer and I haven’t sewn in months, I knew that I couldn’t send the kiddos to school without some handmade decked-out backpacks. It was a great excuse for me to take the time to do some sewing again.
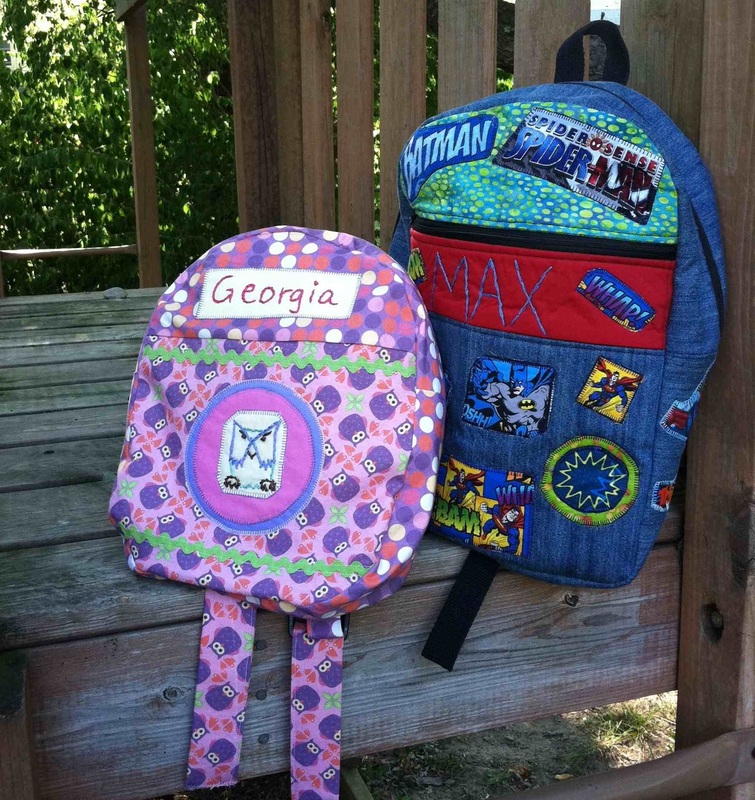
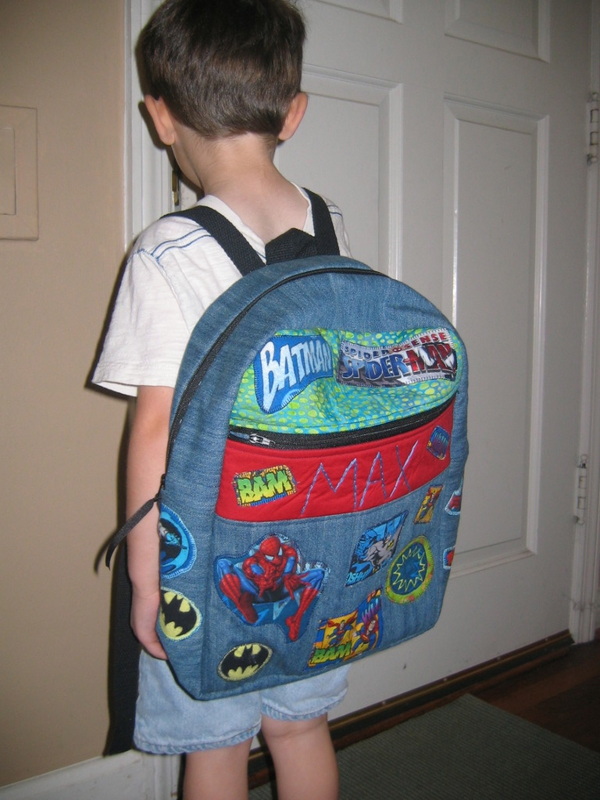
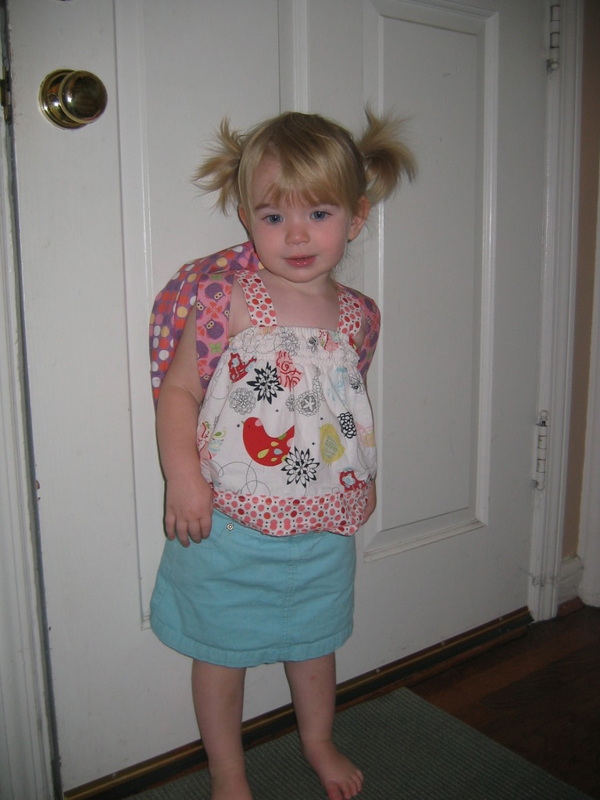
Georgia, bless her heart, has no idea that school is about to happen, or what in the world she needs with this backpack thing (she’s 2). But Max (4) had a very specific request for his back. He loved his Penguin Backpack from last year, but this year, he was ready for something a bit more grown up. And he knew exactly what. “I want Batman on one side, and Spiderman on the other. And mama, Superman too, if you can fit him.” No problem, kiddo!
Now, all summer long, my husband had been taunting me with back-to-school ads that show various superhero backpacks. “You could just buy one and be done now . . .,” he kept saying. As if. Do you even know me, dude?
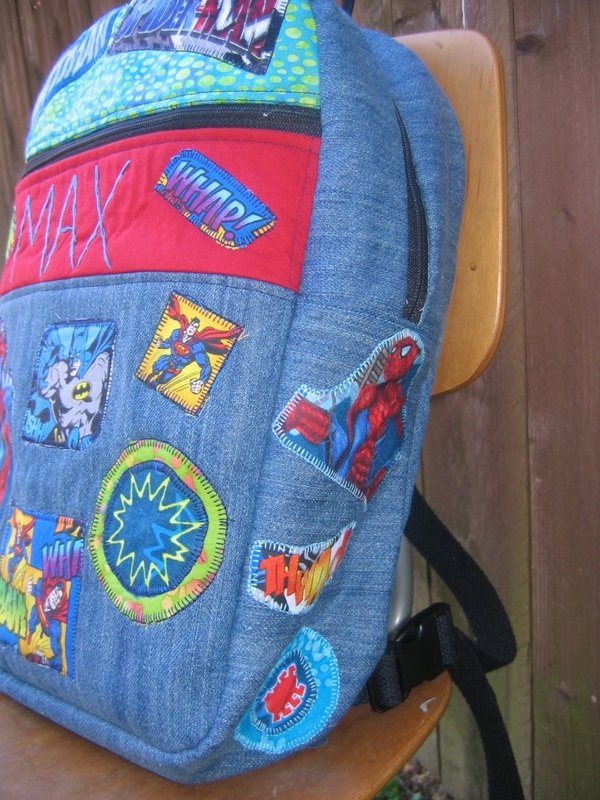
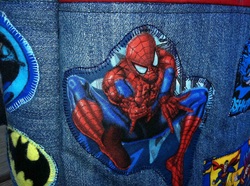
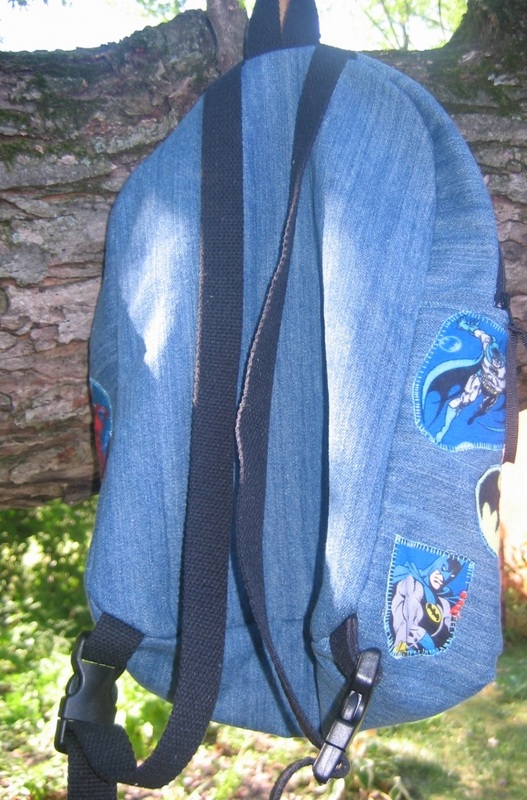
For Max, it took a while to find the right pattern (the toddler and preschool backpack tutorials I kept finding all looked too small). I actually wound up using Simplicity 1823. It’s quite girly looking on the pattern envelope, but I knew that I could boy it up with a superhero theme. I found some Spiderman, Superman, and Batman fabrics at Jo-Ann’s, and cut out various images to make appliques. For the main body of the backpack, I decided to use a basic denim, since I wanted it to be able to take some wear and tear (and I figured it would look good with the superhero red, white, and blue palette). I lined it with an inexpensive light blue cotton.
The pattern is a really good one actually: it’s very sturdy (lined, with both a layer of interfacing, and a layer of fleece). I’d say it’s a lot of sewing—not hard or complicated. Just a fair amount of seaming things together (although I was doing a bunch of appliques, so it probably felt like more sewing than it was).
I will say that there is one mistake in the pattern: it never tells you to cut out a lining piece for the front. But once I went to put the lining together, I realized I had only cut one for the back, as directed. So, I just used the back piece to cut out one for the front (the finished front is exactly the same as the back). No big deal.
I think the appliques turned out great, and I personalized it with his name. There may be other Maxes, and there may be other superhero backpacks, but there will be no other boys named Max with this superhero backpack.
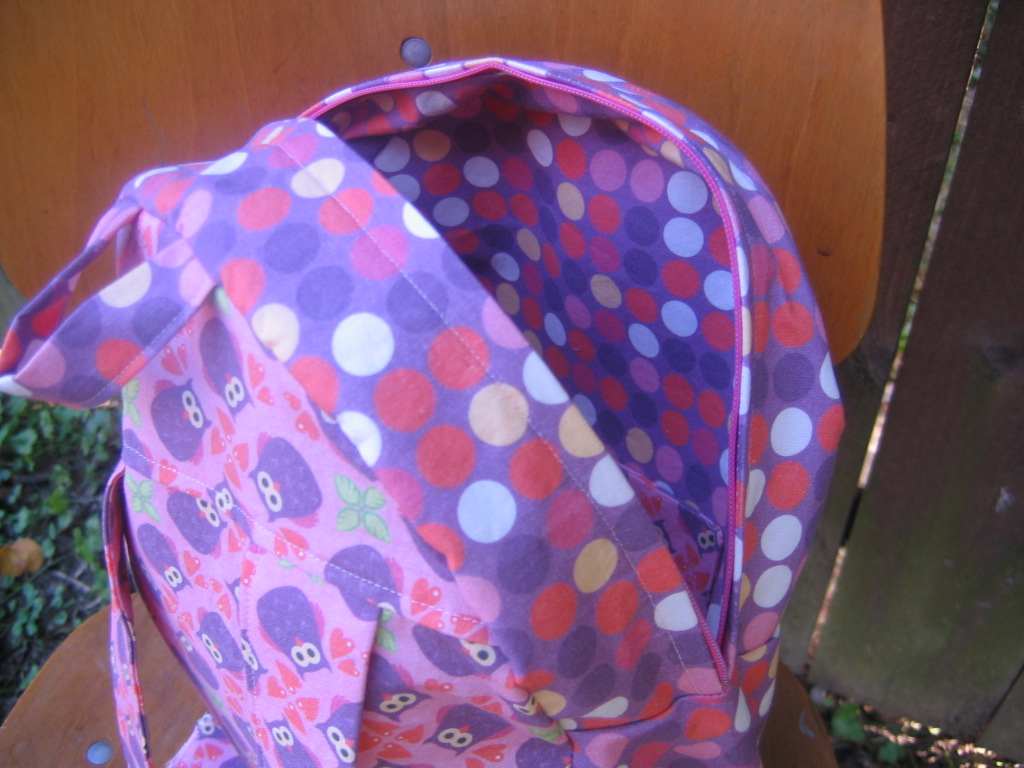
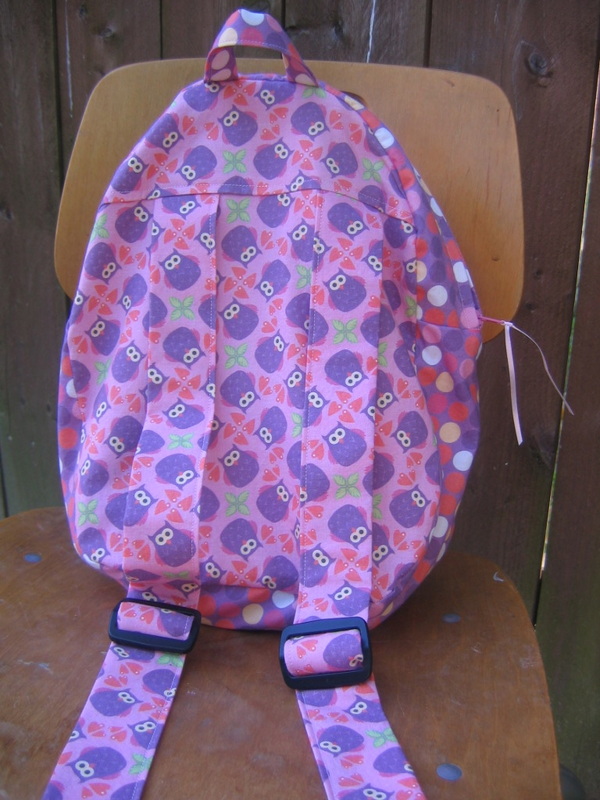
As for Georgia, I decided to go back to the wonderful Oliver + S pattern I used last year to make the Penguin Backpack (from the book Little Things to Sew). It’s smaller, but since she won’t have a homework folder or large art projects, it’s perfect. Instead of the penguin, I kept it simple, and did an owl motif. I found this fabric on Spoonflower, designed by Hamburgerliebe. I used an owl embroidery transfer from Sublime Stitching, and made a 3-layer applique, using some pink and purple solids I already had. A little rickrack, and the whole thing popped. And of course, I personalized it by appliqueing her name, too.
I highly recommend both patterns, even for beginners. I really like the way the Oliver + S pattern has you attach the lining (I wish I had used that technique to attach the lining of the superhero backpack, because it took a lot of pressing and a little tacking to get the lining to fit snugly). Don’t let the zippers scare you in either pattern. It’s really quite easy and workable to put them in. As for straps, the Simplicity pattern uses parachute clips, and the Oliver + S pattern uses traditional strap adjusters (you could do either though).
Sewing backpacks for the little ones got me back in the groove of sewing. I was completely burned out after a summer of demanding deadlines and zero free time. I forgot how meditative it could be to just sit and sew in the evening. So, stay tuned for more projects, tutorials, and giveaways!
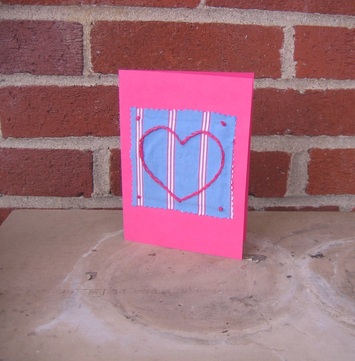
Want something different this year? Here are three quick ideas for Valentine’s Day cards!
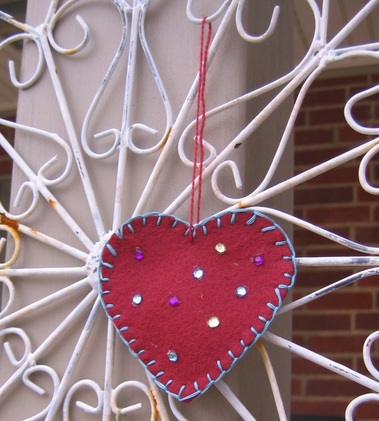
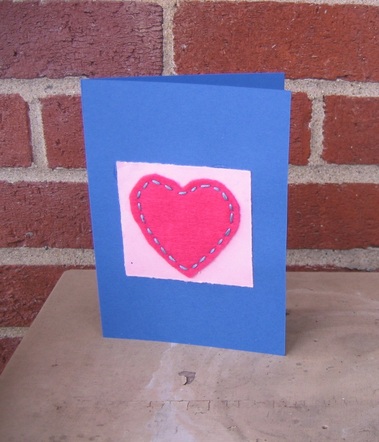
#1: Stitched Felt Heart Card This is a great project for young sewers because it only uses a basic running stitch. The color combinations are endless. It’s easy, but looks very impressive.
You need: -- Piece of felt (craft felt or wool felt) -- Embroidery floss, pearl cotton, or yarn with stands pulled apart and needle -- One small scrap and one card-size piece of cardstock -- Craft glue or double-stick tape
1. Download the heart template. Use either size (I used the smaller one in the example). Cut out one heart from felt.
2. Cut a square from one piece of cardstock. Center the heart in the middle. Pin, or use a dab of glue in the middle to keep it secured to the paper while you stitch.
3. Tie a knot in the end of your embroidery floss (I used all 6 strands together), pearl cotton, or single strand of yard. Start from behind, and take a basic running stitch all the way around the edge of the heart, through the paper. Tie another knot at the end.
4. Glue (or use double-stick tape) the square of cardstock to the front of your card.
5. Write a cheeky note inside, like “You always keep me in stitches!”
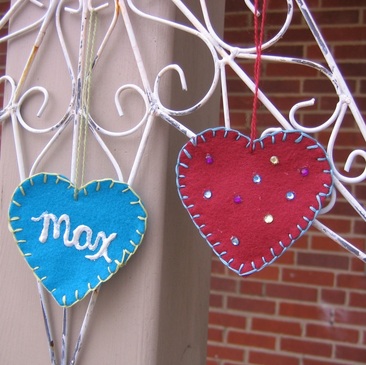
#2: Blanket-stitched Heart Pendant Who says your Valentine has to be a paper card? Try this felt heart pendant. Use paint to write your Valentine’s name, or embellish with gemstones (keep it age appropriate, and obviously, avoid using anything that curious little ones will pull off and put in their mouths). Attaching a piece of floss or yarn means you can leave it hanging somewhere fun where your Valentine can find it, like on the bathroom mirror, coffeepot, or backpack hook
You need -- Felt -- Embroidery floss, pearl cotton, or yarn pulled apart to single strand -- Embroidery needle -- Paint and/or gemstones (optional)
2. Cut two hearts from felt (layer so you’re cutting them at the same time). Pin them together.
3. Tie a knot in your embroidery floss, pearl cotton, or yarn. Do a blanket stitch. Don’t know how to do it? It is EXTREMELY easy. Watch my short how-to video here. Tie a knot at the end.
4. Use the same or contrasting floss, pearl cotton, or yarn to make the loop for hanging. First, tie a knot in the end of the floss. Starting from behind at the top point of the heart, pull your needle through. Create a large loop by taking another stitch back through (from behind), and then anchoring it with one more stitch. Tie a knot and clip thread ends.
5. Embellish by painting name, attaching gemstones, etc.
#3: Recycled Heart Card This is the most involved of the three, but still not difficult. It just uses a very basic split stitch. It’s a great way to re-purpose an old shirt (this was a shirt of my husband’s).
You need --Heart template -- Embroidery hoop -- Scrap of fabric (or a repurposed textile) large enough to fit in hoop -- Embroidery needle -- Embroidery floss -- Pinking shears -- Blank piece of cardstock (folded into a card shape) -- Fabric glue (I like Liquid Stitch) -- Rhinestones (optional)
1. Trace a square (about 3-1/2 inch) in the center of your fabric. Trace the heart (the smaller heart on the heart template) in the center of the square. (Use an erasable fabric marker or a thin, non-smudgy ballpoint pen to trace.) Don’t cut anything out yet.
2. Put fabric in the embroidery hoop, and tighten hoop until fabric is taut.
3. Thread embroidery needle (I use all 6 strands together). Tie a single knot at the end of the floss.
4. Start first stitch along one of the sides of the heart (hint: don’t start on a curve). Start from the back, push needle up through fabric and pull until the knot stops the floss behind.
5. Stitch back down through the fabric, about 1/8” to 1/4” from where you came up.
6. For your next stitch, come up through the middle of your last stitch. This is called a split stitch, because you are “splitting” the pieces of floss each time. Want a visual? Watch my quick how-to video.
7. Keep stitching all the way around the heart using the split stitch. Keep your stitches uniform (1/8” to 1/4”). When you come to a curve, you have to manipulate the floss into a curved shape as you stitch.
8. When you get all the way around, run your floss under a few stitches in the back to secure and snip.
9. Optional: do French knots in each corner of the square. If you don’t know how to do a French knot, you can learn by watching my easy how-to video. Another option is to glue on some rhinestones in the corners.
10. Remove fabric from hoop. With pinking shears, cut around the square you traced. (Try to cut inside the line you traced so that the tracing isn’t visible)
11. Place a thin layer of glue on the backside of the fabric and adhere to the front of the card. You could probably also use double-stick tape.
Throughout the year, I’m going to do a series of quick ideas for boys’ clothes/accessories (sometimes a free pattern, sometimes a pattern review, and sometimes a quick modification or easy embellishment). There’s no shortage of ideas out there for girls’ sewing (ribbon and rickrack and rosettes!), but the creativity needs a bit more coaxing for boys (at least in my opinion). One problem is that because pattern books and magazines show so few boys wearing even the gender-neutral stuff (like T-shirts), it’s easy to overlook these patterns and think it’s just all girls’ stuff.
Today, I’m offering the first two Boy Sewing Brainstorms!
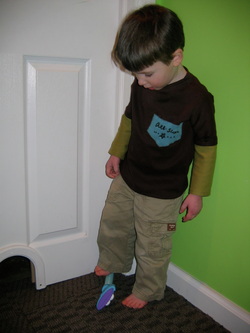
Boy Sewing Brainstorm #1: Make faux-layered sleeves for a t-shirt.
I’m cheating a little because I already blogged about this when I talked about making this Simplicity T-shirt pattern (Simplicity 5317). I love the look of layered sleeves, and though I wear this look myself, there is something particularly boy about it. It can transform a blah t-shirt into an interesting T-shirt. It’s also a great way to use up little bits of knit fabric. Read about how to do it here.
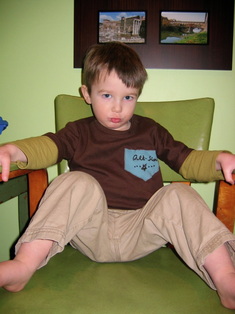
Boy Sewing Brainstorm #2 Add an embroidered patch to a t-shirt.
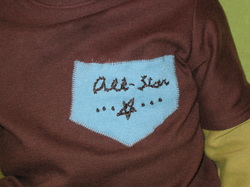
Yes, one more T-shirt idea (what can I say? Boys wear a lot of T-shirts). Once again, this is my favorite Simplicity T-shirt pattern, again with faux-layered sleeves. But to individualize this one a bit, I decided to make a special “All-Star” patch. Instead of using a font and printing it out, I wrote it out myself (because I wanted a genuinely handwritten look) and drew the little star (unevenness adds character, after all). I transferred it using embroidery transfer paper (I used DMC brand, but will use some from Sublime Stitching next time).
Then, I embroidered it, using a simple split stitch, and added the French knots on each side. (I think I’ll invest in some of Sublime’s Stitching’s T-shirt stabilizer next time though, because I found it challenging to embroider on knit and didn't do the best job with my stitches.) I put some TrueGrid over top the finished embroidery and cut it in the shape of a pentagon and then cut out my patch. I just used a machine applique stitch to attach.
If you come across great boy sewing ideas (which are certainly out there--I'm in the process of collecting them myself), feel free to leave a comment and link and I'll repost.
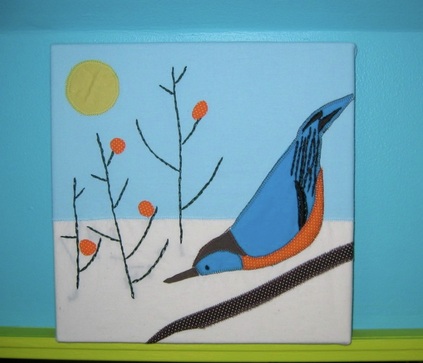
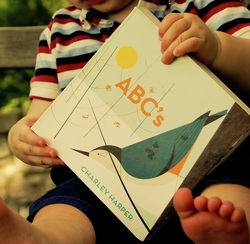
Okay, my crankiness seems to have passed (even though there’s like 4 inches of snow out there on the first day that I actually feel well enough to go running. Grr …). Going to “Crafty Christmas” yesterday (a little event organized by my friend Tricia, who is the most amazing cook/baker), and seeing all the lovely creations that people made, definitely lifted my spirits. My contribution was this Charley Harper-inspired bird collage.
I knew that, like me, my secret Santa recipient was a big Harper fan, so I thought she might appreciate this re-imagining of the Harper print that graces the cover of the ABC book. It’s a combination of embroidery and machine-appliqué on muslin, and then I stretched the muslin across a 12” by 12” canvas and used a staple gun to secure. It’s my first attempt at doing a collage stretched across canvas like this, so I’m pretty happy with it.
One thing I still need to improve upon is the backside of my embroidery. I never pay much attention to how messy it gets because I figure that no one will ever see it. However, because I used a pretty thin muslin, and because the muslin is stretched so snugly across the canvas, the backside does show through! So all of my knots and jumble of stops and starts are sort of visible. My husband was sweet and said it just looks like shadows on the snow, so I’m going with that!
I bought a pack of two canvases at Michael’s, so I still have one left. I’m anxious to try my hand at this project again using a different Harper print for inspiration.
In the two years since I had my last baby, I've forgotten a lot. Like how utterly exhausting those cute little blobs are! I had this idea that I would just have all kinds of time to catch up on everything after she was born.
Um, no.
You'd think I'd know better! But it is easy to forget how much time and attention they need. I'm such a routine-craving person that I am desperately trying to get Georgia on a schedule, but I know it's pretty much futile at this point (she's only 12 days old, after all). So free time seems elusive these days!
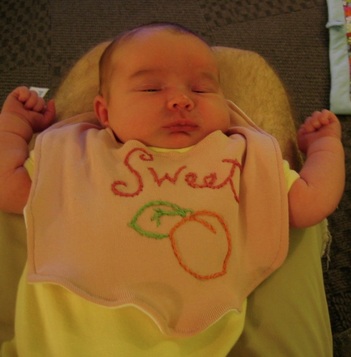
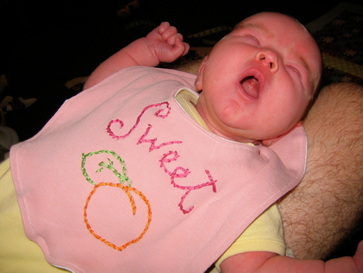
However, I did manage to make this cute bib! We've gotten some super cute girl clothes, but are still loaded down with lots and lots of boy-themed bibs. I don't mind--I'll put a bib with a football on her since it's just going to get spit up on in two seconds. But I wanted a few girly bibs for company and outings. I embroidered this "sweet peach" bib in between (very frequent) nursings. I repurposed an old pink maternity top that I never wanted to see again.
My little Georgia peach
I had never embroidered on knit before, and it's a little trickier than I thought. I used some interfacing as a stabilizer, but I probably didn't use the right kind (I just grabbed whatever I had in my stash). My stitches certainly aren't perfect. And my top-stitching is crooked too. But it was nice to just steal away to my sewing room for a few minutes while she was napping to get it finished! As I wrote about a few weeks ago, I have a whole catalog of projects I want to make, but all in good time.
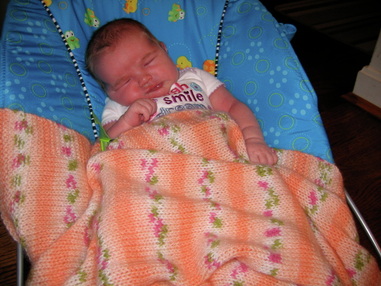
Speaking of projects, I'm loving this gorgeous blanket my friend, Andrea, knitted for Georgia. As I said, we're overrun with blue, green, yellow and boy-themed stuff, so it's nice to have something girly, but still with a sort of mod feel.
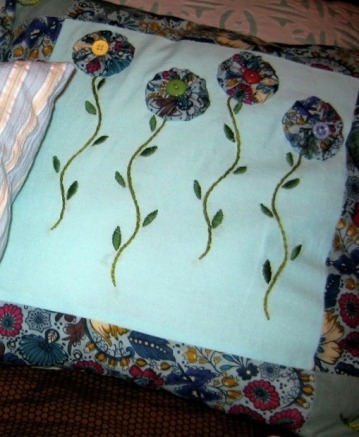
My first embroidery project, stem patterns from Sublime Stitching
I thought I didn’t like handwork. I’ve always dreaded hand-basting and hand-hemming when I sew. I get irritated when I have to slip-stitch the opening of a quilt together after I turn it.
But something about embroidery always seemed appealing to me. Truthfully, I think it’s all the pretty colors on the DMC floss wall. But it must be complicated, I told myself for years, and involve all kinds of intricate techniques and stitches and things that would stress me out.
Then I picked up a copy of Sublime Stitching, by Jenny Hart in the bookstore one night about a year ago, and the wooing began in earnest! I put it on my wish list for my birthday a few weeks later, and my husband got it for me. It sat on my bookshelf untouched, but every week, I’d think, this will be the week I’m going to learn to embroider!
One Sunday afternoon about two months ago, Max was napping, my husband was playing his guitar, and I found myself with a blissful 90-minute stretch with nothing to do (this never happens). I wasn’t really in the mood to sew, so I pulled out Sublime Stitching again, and within a half-hour, I was embroidering! I transferred her sampler/learn-to-embroider page onto some muslin (the whole idea of transferring gave me the shivers at first, but it is SO easy), and took my first stitches using some floss and an old hoop I found in the bottom of my sewing basket. Within minutes, I decided I loved it!
The next day (after a trip to the craft store for supplies) I started my first real project, some flower stems for a pillow (with sewn yo-yos for the flowers). For the next few nights, I sat down after the baby was in bed and the work was done, propped up my feet, watched something mindless on TV and embroidered away. It was so relaxing! I’ve heard Alicia Paulson talk on Craft Sanity about how embroidering is what got her through recovering from a very bad car accident and many surgeries to her foot. I can completely understand that now. The repetitive motion of the needle back and forth through the fabric and the act of holding the floss and watching the pattern form has a way of numbing both the pain response and the stress response. When I’m embroidering, I feel so at peace (and trust me, I’m not a person who uses often phrases like “I feel so at peace”).
.
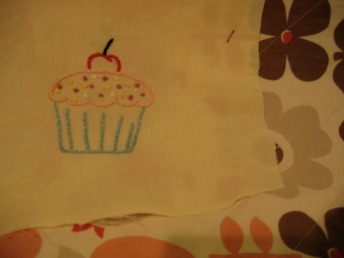
Ooh la la, cupcakes! Another Sublime Stitching transfer
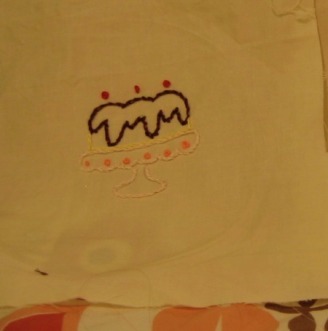
A lovely cake plate. Do you sense a theme?
Of course, my stitches are far from perfect! I’ve got the split spit, the satin stitch, and the French knot pretty well established, but I haven’t ventured much further. It’s still a learning curve, though I was excited to be able to embroider several Cliffords for a Clifford quilt that I made for Max for his first big boy bed (more on that later). I look forward to checking out the other Sublime Stitching embroidery books; Alicia Paulson also has a new book coming out this month, and I definitely have my eye on that. Right now, I’m trying to figure out what to do with these adorable cupcakes and cake plates I just finished the other day. As the last few (very uncomfortable) weeks of pregnancy descend on me, I can’t think a better way to spend my time!


 RSS Feed