Bonus Projects

Ladies Who Lunch Clutch
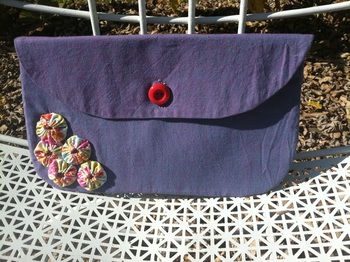
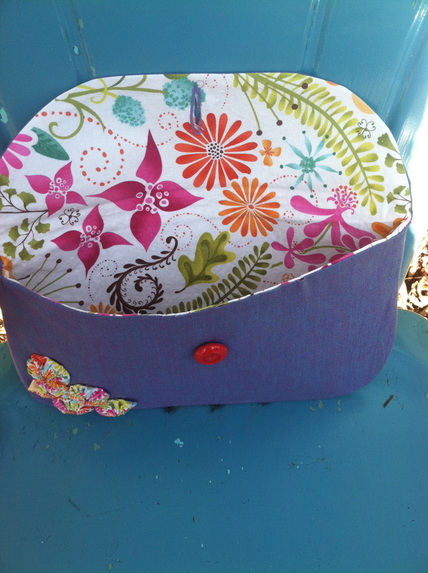
This simple clutch purse is fast and easy. Embellished with yo-yos, it feels a little retro. It reminds me of ladies who lunch (even though I wouldn’t even know how to be a lady who lunched). There are so many ways you could attach the flap to the purse front, but I just used simple button.
What You Need
Make Your Pattern Pieces
Because I’m working with a standard 8-1/2 by 11” paper size (so you can print from your home printer and not have to tape together), the pattern pieces are half-size in the PDF, and you’ll use the fold to make the full size pattern piece (but it doesn’t need to be CUT on the fold of the fabric once it’s made).
It’s a lot of folding and unfolding, but I promise, it’s all logical.
What to Cut
Assemble the Purse
Seam allowance: ½ inch
This simple clutch purse is fast and easy. Embellished with yo-yos, it feels a little retro. It reminds me of ladies who lunch (even though I wouldn’t even know how to be a lady who lunched). There are so many ways you could attach the flap to the purse front, but I just used simple button.
What You Need
- Craft paper or lined Pellon (like True Grid) to make your pattern pieces
- Fat quarter (or ½ yard) of two different fabrics, one for main and one for lining
- Large piece (1/2 yard) of medium-weight interfacing
- Scraps for yo-yos
- One large button
- Pattern piece template, available right here
Make Your Pattern Pieces
Because I’m working with a standard 8-1/2 by 11” paper size (so you can print from your home printer and not have to tape together), the pattern pieces are half-size in the PDF, and you’ll use the fold to make the full size pattern piece (but it doesn’t need to be CUT on the fold of the fabric once it’s made).
- Print out the PDF full size. Cut around the outside line.
- Place that piece of paper on the fold of your craft paper or Pellon. Trace around to make your basic pattern piece that we’ll use for both purse pieces. Transfer the fold line (where it says “fold here to make front piece”). Cut out and unfold.
It’s a lot of folding and unfolding, but I promise, it’s all logical.
What to Cut
- From main purse fabric: Cut one back/flap piece and one front piece
- From lining: Cut one back/flap piece and one front piece
- From interfacing: Cut one back/flap piece and one front piece
- From accent fabric: Cut five circles, about
3-inches in diameter (the cardboard form of a ribbon spool will be a good
template)
Assemble the Purse
Seam allowance: ½ inch
- With right sides together, pin purse front to purse back at sides (the flap will extend up beyond where you pin). Begin at one side and stitch all the way around the bottom curve to the other side.
- Trim seam and clip curves.
- DON’T turn right-side out.
- Fuse your interfacing to the wrong side of each lining piece.
- Repeat steps 1 – 2 with lining pieces. But DO turn the lining.
- Now you have two pieces that look identical, except the purse is inside-out and the lining is right-side out.
- Insert the lining into the purse, so that right sides are together. Align the seams and raw edges.
- Starting at the purse top edge, pin all the way around the curve of the flap and the top edge of the purse. Use your pins to mark a 4-inch opening at the purse top edge (the edge that the flap will fold over—this is the best place for the opening because it’s straight, versus curved).
- Stitch all the way around, leaving the 4-inch opening in the top of the purse.
- Turn the purse right-side out and stuff lining back down into purse. Push out rounded corners and re-align seams.
- You’ll need to do some smoothing, pressing, and shaping to get a crisp, rounded edge and to get everything aligned. (I pin layers together with safety pins to hold in place as I straighten everything out, and then I press.)
- Slip-stitch the opening in the purse top edge closed.
- Make a button hole in the flap, and sew button to purse front.
- Make yo-yos (see tutorial here) and hand-sew in place (you can use fabric glue to hold in place/get them into position).

