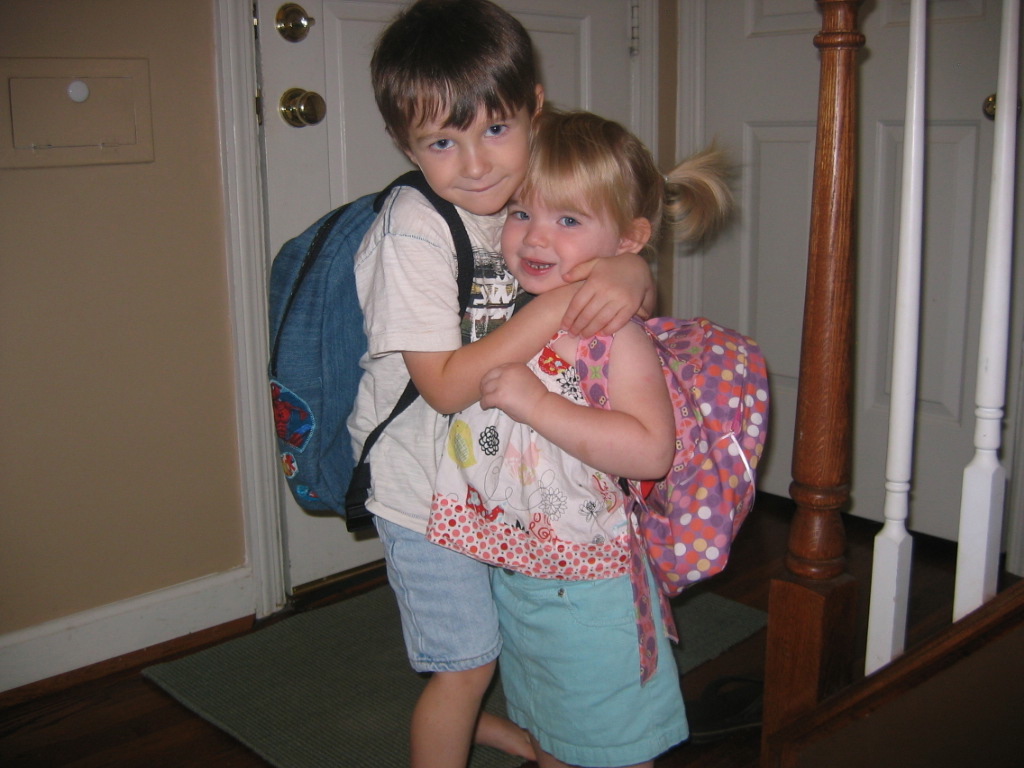
Back to school: what a sweet phrase that is! Max heads back to preschool (Pre-K, to be exact) and his little sister, Georgia, heads to a toddler program. Even though it’s been an insanely busy summer and I haven’t sewn in months, I knew that I couldn’t send the kiddos to school without some handmade decked-out backpacks. It was a great excuse for me to take the time to do some sewing again.
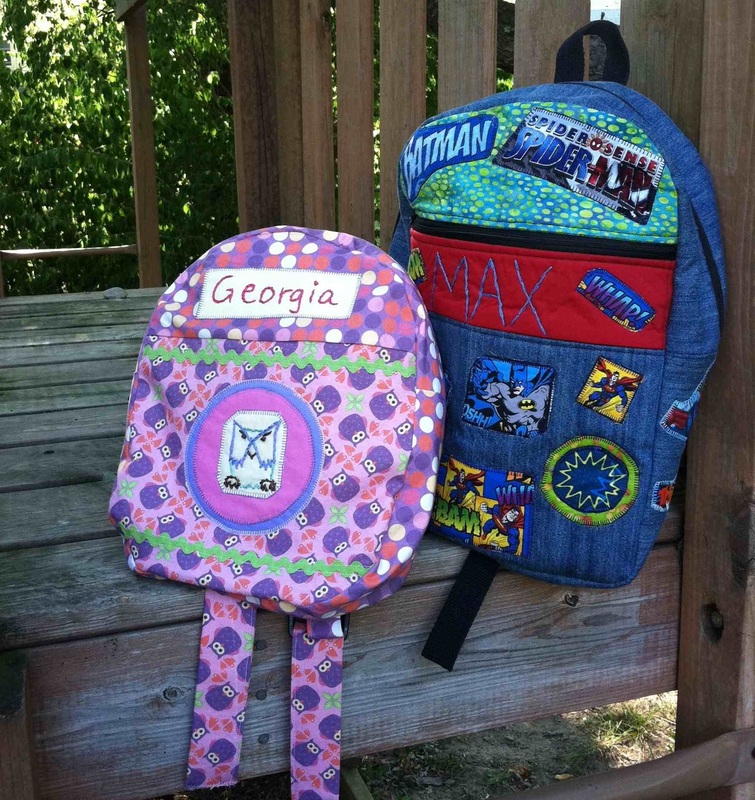
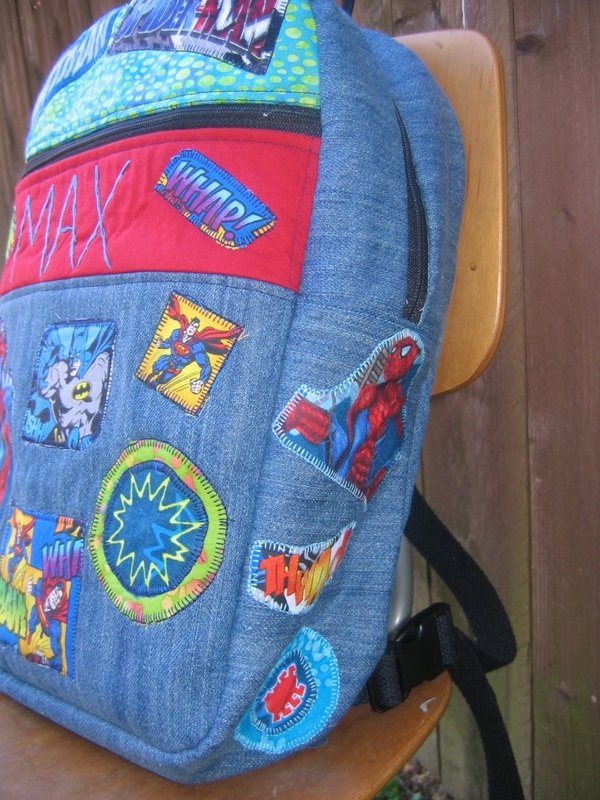
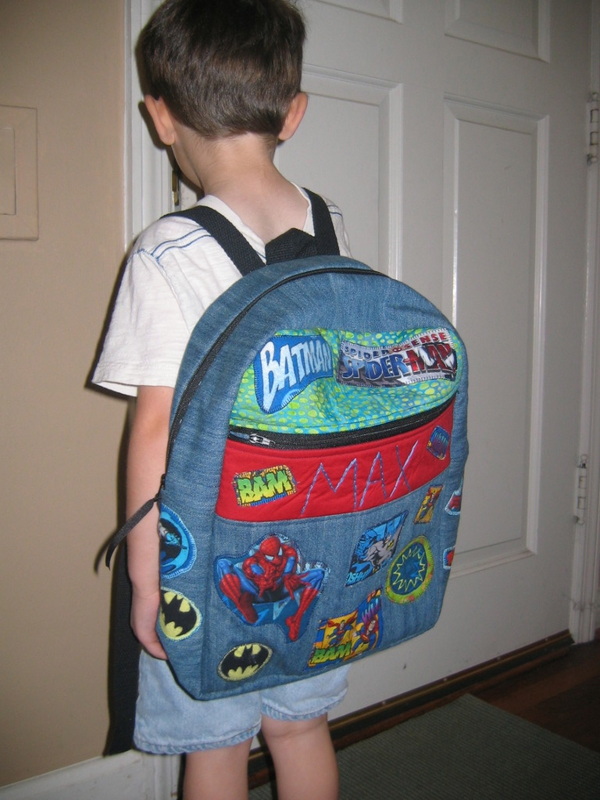
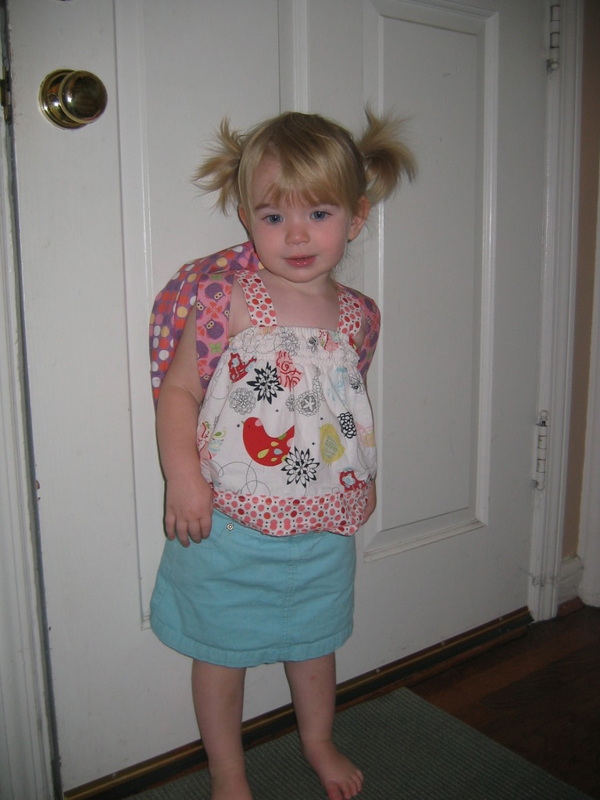
Georgia, bless her heart, has no idea that school is about to happen, or what in the world she needs with this backpack thing (she’s 2). But Max (4) had a very specific request for his back. He loved his Penguin Backpack from last year, but this year, he was ready for something a bit more grown up. And he knew exactly what. “I want Batman on one side, and Spiderman on the other. And mama, Superman too, if you can fit him.” No problem, kiddo!
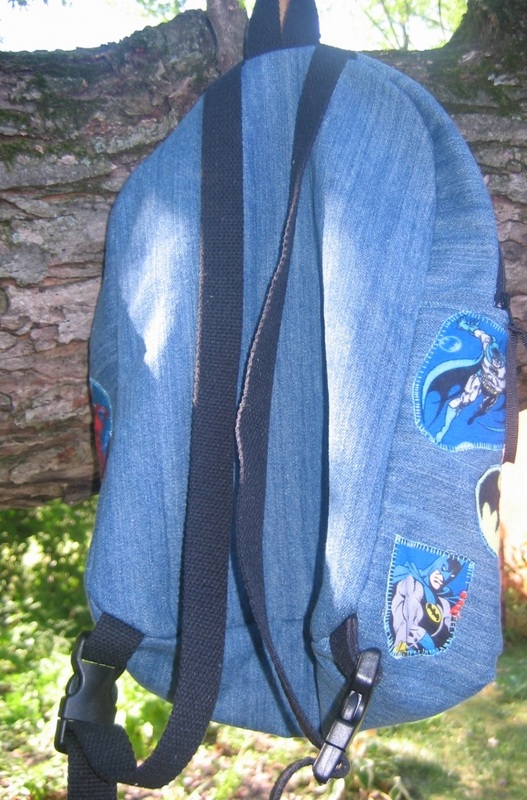
Now, all summer long, my husband had been taunting me with back-to-school ads that show various superhero backpacks. “You could just buy one and be done now . . .,” he kept saying. As if. Do you even know me, dude? For Max, it took a while to find the right pattern (the toddler and preschool backpack tutorials I kept finding all looked too small). I actually wound up using Simplicity 1823. It’s quite girly looking on the pattern envelope, but I knew that I could boy it up with a superhero theme. I found some Spiderman, Superman, and Batman fabrics at Jo-Ann’s, and cut out various images to make appliques. For the main body of the backpack, I decided to use a basic denim, since I wanted it to be able to take some wear and tear (and I figured it would look good with the superhero red, white, and blue palette). I lined it with an inexpensive light blue cotton. 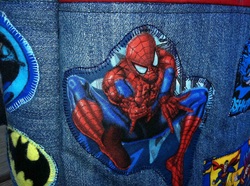 The pattern is a really good one actually: it’s very sturdy (lined, with both a layer of interfacing, and a layer of fleece). I’d say it’s a lot of sewing—not hard or complicated. Just a fair amount of seaming things together (although I was doing a bunch of appliques, so it probably felt like more sewing than it was).
I will say that there is one mistake in the pattern: it never tells you to cut out a lining piece for the front. But once I went to put the lining together, I realized I had only cut one for the back, as directed. So, I just used the back piece to cut out one for the front (the finished front is exactly the same as the back). No big deal.
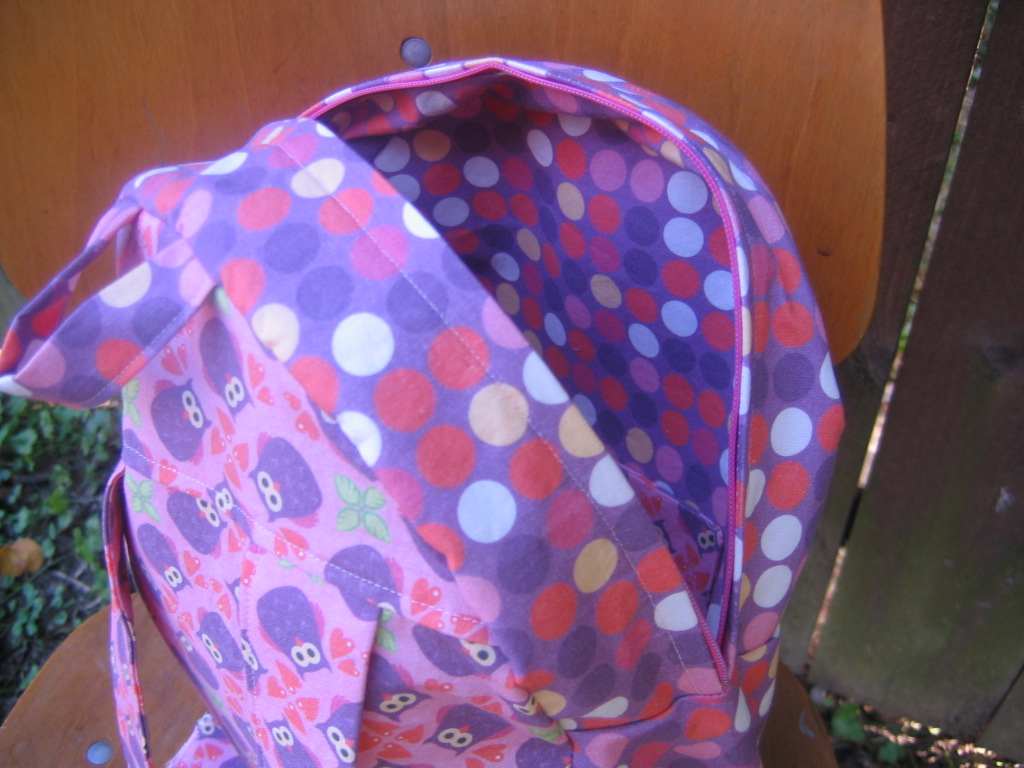
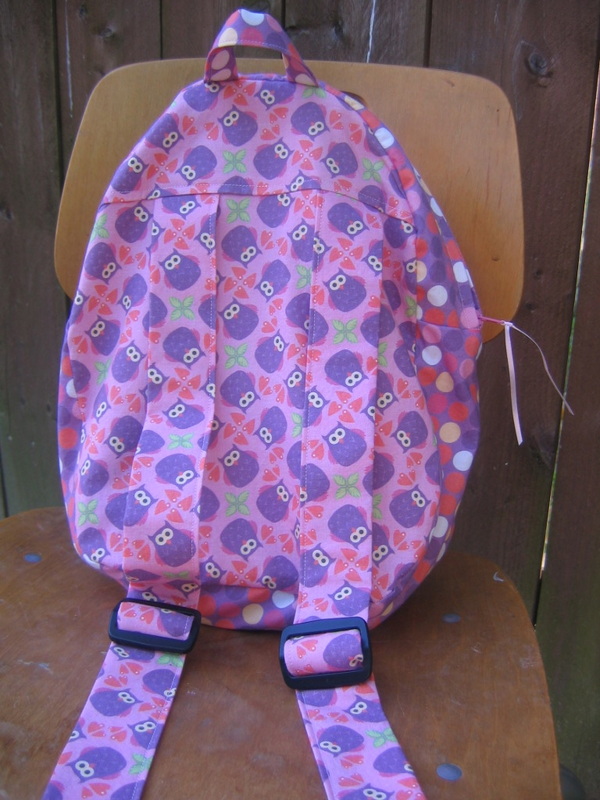
I think the appliques turned out great, and I personalized it with his name. There may be other Maxes, and there may be other superhero backpacks, but there will be no other boys named Max with this superhero backpack.  As for Georgia, I decided to go back to the wonderful Oliver + S pattern I used last year to make the Penguin Backpack (from the book Little Things to Sew). It’s smaller, but since she won’t have a homework folder or large art projects, it’s perfect. Instead of the penguin, I kept it simple, and did an owl motif. I found this fabric on Spoonflower, designed by Hamburgerliebe. I used an owl embroidery transfer from Sublime Stitching, and made a 3-layer applique, using some pink and purple solids I already had. A little rickrack, and the whole thing popped. And of course, I personalized it by appliqueing her name, too.
I highly recommend both patterns, even for beginners. I really like the way the Oliver + S pattern has you attach the lining (I wish I had used that technique to attach the lining of the superhero backpack, because it took a lot of pressing and a little tacking to get the lining to fit snugly). Don’t let the zippers scare you in either pattern. It’s really quite easy and workable to put them in. As for straps, the Simplicity pattern uses parachute clips, and the Oliver + S pattern uses traditional strap adjusters (you could do either though). Sewing backpacks for the little ones got me back in the groove of sewing. I was completely burned out after a summer of demanding deadlines and zero free time. I forgot how meditative it could be to just sit and sew in the evening. So, stay tuned for more projects, tutorials, and giveaways!
First day of school: is there a sweeter concept than that? Especially after a long, hot summer. And an even longer Labor Day weekend.
I’ve accepted that I’m in a phase in my life where weekends just aren’t the leisure and loveliness they used to be. For example, 3-day weekends that alternate between so hot you can’t even go outside to freezing and raining, and involve a very busy 1-year-old, and a 3-year-old who still hasn’t quite gotten the hang of pooping in the toilet, really aren’t very fun.
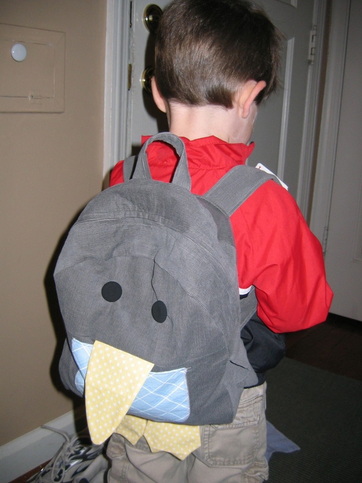
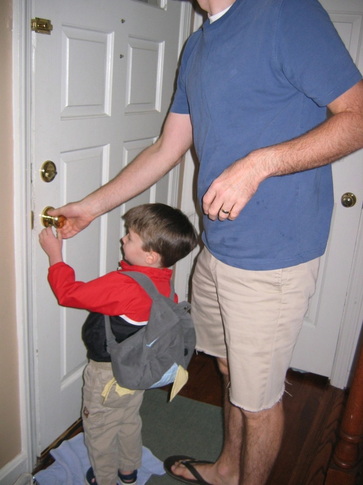
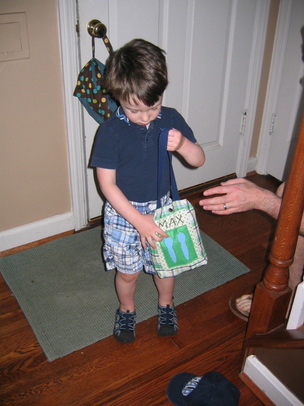
So I was thrilled to go to bed last night, and know that today, we could start over! It did feel like a fresh start this morning, as Max headed off to preschool with daddy, with his backpack strapped on his back like he knew exactly what he was doing. Was I thinking: “ooh, my sweet little boy! I will miss him so much! How has he gotten so big, so fast?”
Um . . . no. I was thinking: “I am so glad I get to head upstairs and get back to work. And damn, that’s a good-looking backpack!”
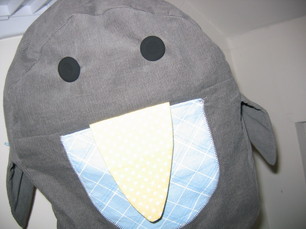
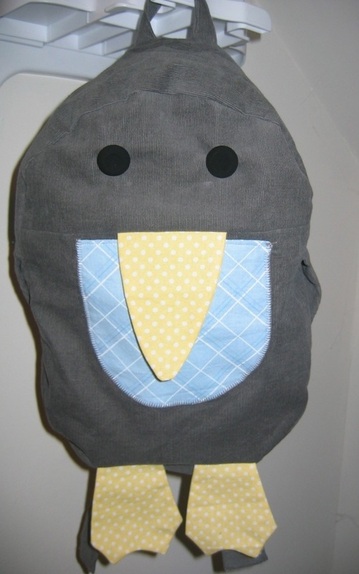
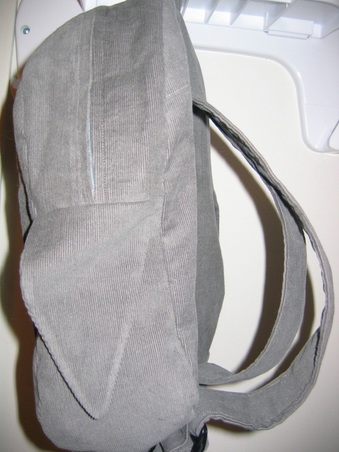
It’s a pattern from Oliver + S Little Things to Sew. I am digging this book sooo much, and I’ve already got about 6 other projects dog-eared. Max zeroed in on this backpack immediately. There was no “hmm, well, maybe, but can you make it out of Scooby-Doo fabric?” It was: “I want THAT backpack, mommy!” 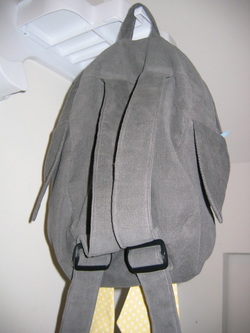 I pretty much matched the colors of the pattern: I picked out a grey corduroy for the body, a blue with a subtle diagonal plaid for the front pocket, and a yellow with a small white dot for the beak and feet. I lined the whole thing with basic light blue cotton broadcloth. I had a hard time finding the right-size strap adjusters at Jo-Ann’s, so I ordered some from Hardware Elf (they came within just a few days).
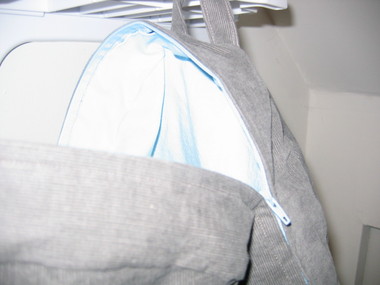
 Overall, it’s really a fantastic pattern. There are a LOT of pieces (more than a dozen). As I was tracing the pieces and cutting them out, I began to wonder if I was in for something way more complicated than I anticipated. But it’s actually a very simple pattern, with very, very clear and smart directions. In fact, I learned a new way to make an outside pocket even cleaner at the top. The whole backpack is constructed beautifully—lined and reinforced in the right places. The directions for the zipper are good, although I sort of followed my own method (but don’t be intimidated if you’ve never done a big zipper—it’s super easy, I promise).
I wish it were just slightly bigger (the preschool instructed us to make sure the kids’ backpacks were big enough for their “homework” folder—and this one is, but just barely).
Overall, I can’t recommend this pattern enough for a kid's backpack, whether you want to do the penguin, or leave off the beak and feet and pick out a snazzy fabric.
And now, I’m going to enjoy the remaining hours of peace before I hear little feet scampering back inside . . .
You know how in the beginning of a new relationship, you are so smitten, you can barely think about anything else than how into the new relationship you are? You imagine scenarios. You spend hours daydreaming, running through interactions, maybe even staring at pictures of the two of you together? It’s just passion, all day, all the time.
Well, my new iPhone and I are in that phase.  This isn't actually my iPhone. My pictures turned out bad, so I grabbed an image! I’ve had it less than a week, but I think it’s fair to say that it’s true love. When I stare into its beautiful crystal-clear screen, I feel like giddy and tingly.
For the past few months, I’ve bee saying I’m going to get an iPhone. But I was worried that I wasn’t tech savvy enough. Everyone talked about how easily it synced, but even just the idea of syncing made my stomach hurt. The thought of setting up accounts, figuring out how everything worked, dealing with what was sure to be one headache after another—I just didn’t want to take it on. And changing cell phone plans (I had T-Mobile)—surely that was a huge pain, right? Plus, I’ve barely had time to do anything the past few months with the big project I was involved in.
But then on Tuesday, with all deadlines met, I finally found myself with a free afternoon. I went to Caribou Coffee to chill for a while, and saw that a Verizon store was right next-door. It must be fate, I decided. An hour and-a-half and like a million dollars later, I walked out the door with my iPhone! My number was transferred, just like that.
What really surprised me is that having never used a smart phone before (or even paid attention to them), I immediately understood how to use it. I started downloading apps, taking pictures, and (with my breath held), plugged it into my MacBook Pro. And, somehow, it just knew what to do! All of my music and email just synced, and I didn’t have to do anything.
So, in the past five days, here is what my new iPhone and I have done together:
- Taken tons of pictures, like these:
- Played tons of Words with Friends games with my husband (I’ll never be able to beat him because he plays Scrabble obsessively and knows more stupid words than I care to ever know)
- Took a picture of the penguin backpack from Little Things to Sew, made a list of the supplies I needed with the notes function, downloaded the Jo-Ann’s app and coupons for my shopping trip, and headed with Max to Jo-Ann’s to get all of the supplies.
- Downloaded a running log app to keep track of all my workouts (so I can stop using paper logs—I’ve got piles of them).
- Texted with friends and colleagues, without it taking half an hour to compose a text message. (My previous phone was a 5-year-old flip phone and texting was a major headache.)
- Downloaded an e-copy of Malcolm Gladwell’s What the Dog Saw from my library’s e-pub collection. I’m reading now. I heart Malcolm Gladwell.
- Kept up with friends and groups on Facebook, and posted pictures and videos that I had just taken with the phone.
- Downloaded some free kids’ apps—one makes farm animal noises and one is a coloring book (Max already grasps how to use them).
- Sent and received emails in random places, like while in the car (as a passenger, not a driver!) and at the playground.
- Lots more (seriously, I'm a terrible example of being attached to your phone for my kids. But I'll chill, I promise).
I’d like to say that I posted this blog using it, but alas, I still prefer typing long-form on a real keyboard. But if I get my thumbs into shape, I could absolutely do it!
Anyway, an iPhone is an investment (I paid $200 at Verizon—maybe you can deals, but searching for deals isn’t my thing), and the monthly plan is slightly painful. But not awful. For the convenience and connecting power, it’s worth it. And even for tech novices like me, it’s unbelievably easy to use!
Next on the list: searching fabric and pattern apps!
I’m slowly emerging from one of the craziest months of my business. I had this idea that I would finish up my big project and relax this week. But . . . that didn’t happen.
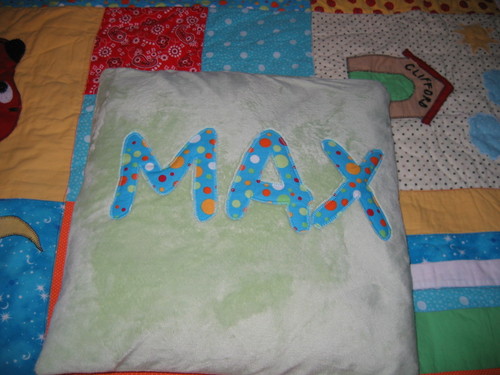
But I did make time Thursday night to watch Project Runway! Thursday was also Max’s birthday, so I snuck about an hour on Wednesday to make this little pillow for him, so he could wake up with it Thursday morning. He’s had this not-very-cuddly brown pillow I made a long time ago in his bed for the past few months. It’s got icky glue patches (where the embellishments fell off) and doesn’t exactly say sweet slumber. I asked him if maybe I could make him a special soft pillow instead, and he was all about it.
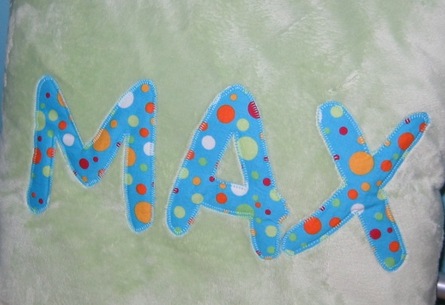
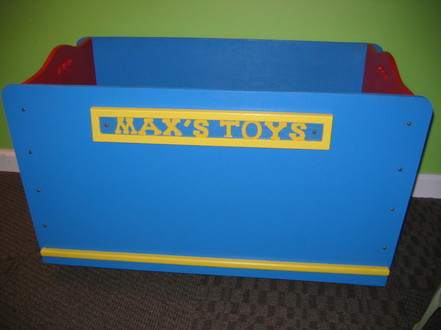
So I rooted through my stash and found a scrap of some ultra soft green stretch veloury stuff. My pillow form was 16 inches, so I cut two pieces, front and back, 17-inches by 17-inches. I used a scrap left from the Clifford quilt to make the letters of his name. To prevent the velour stuff from stretching when I appliqued, I applied some lightweight fusible interfacing on the back. Then, I did a simple machine applique (a blanket stitch) around the letters. Not my best work ever, but a good last minute gift for a 3-year-old. I decided to do a zipper close (following the method I talk about here), stitched up the sides, inserted the pillow form, and the Max pillow was done! I put the pillow onto his bed after he was already asleep Wed night so that he could wake up with it the morning of his birthday. He loved the pillow, although the wooden train cars, Busytown cards, and set of kid-size tools were probably the bigger hit. He also loved the toybox that my father-in-law made (which matches the table that my husband built that I blogged about last week). Next up on the list is a new backpack, since he starts preschool in September. I’m going to use the penguin backpack pattern from Oliver & S’s Little Things to Sew. Have you seen this book? It’s unbelievably adorable!
And eventually, I’ll get around to sewing some girly wonderfulness for Georgia. Her first birthday is coming up in about a month. I mean, seriously, look at this face! In other news, I should have some exciting news to share about Sew Retro soon (I need to make sure all the details are confirmed first). And, on the copywriting side of my business, my new web site is just about to launch (it will be the same domain as my original site, judiketteler.com, and I’m getting rid of jkcopywriting.com). I’m way excited about the design and some of the new aspects of my writing business.
More on that later . . .
The wife is always the last the know. Isn’t that the way it usually goes? Sure, there are signs. Receipts. Strange behaviors you can’t explain. Faraway glances. That’s right. My husband has been hiding something from me. For six years, he kept the secret so well-hidden. But now it’s out.
That’s right, my husband has mad woodworking skills! And he never told me!
I mean, yes, there was the occasional home repair project he seemed just a little too proficient at. And he’s a master at putting together Ikea furniture. But I never suspected this. .
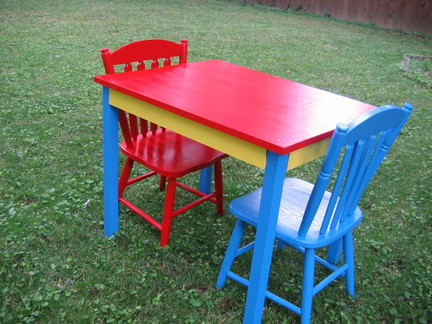
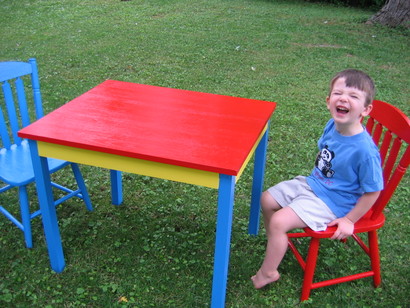
Can you believe he up and made this completely adorable table for the kids? (Not the chairs; they are from the neighbor and have been collecting dust in our basement for two years) And he painted it, and the chairs to match! (My suggestion on the colors—they coordinate with the toy box that my father-in-law made and painted for Max, which he’ll get on his 3rd birthday in a few weeks).
Anyway, here is how it started:
Allen: I think maybe I want to build something.
Me: Okay, do you know how to build things?
Allen: I’ll figure it out. What should I build?
Me: How about building a little art/activity table for the kids, since we’ve been looking for them at flea markets and haven’t found what we want?
Allen: Okay. I’ll build that.
A few conversations with his dad, some borrowing of tools, and three days later, I come home from a day-long meeting, and the table is done.
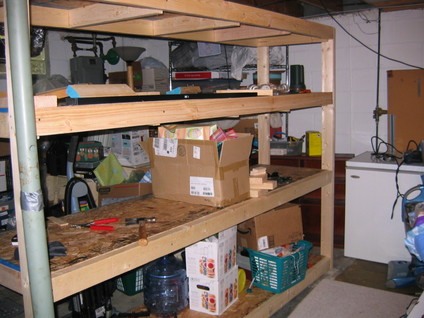
But wait, there is more! After he built the table, he wanted another project. He decided to build a giant shelf to organize the awful, messy, cluttered, downright scary part of the unfinished side or the basement. He decided that on like Wednesday and by Friday, it was done. It’s a monster. I really couldn’t even get a good picture of it. Please do not look at the total mess that is the unfinished side of our basement. This is why we need a giant shelf to organize it. Apparently, he has a vision for the basement of everything in perfect order, with its own place. Sounds beautiful to me!
This morning, he said: “I need another project.” Is there a sweeter sound in the world?
I think it’s time for me to get out the secret list I’ve been keeping in the event that my husband turns out to have crazy woodworking skills that I knew nothing about!
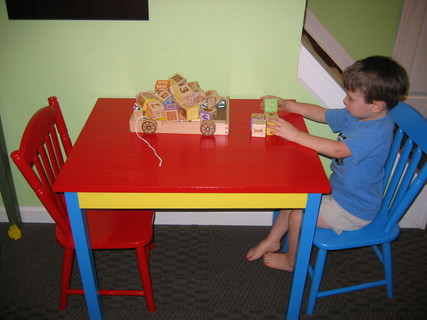
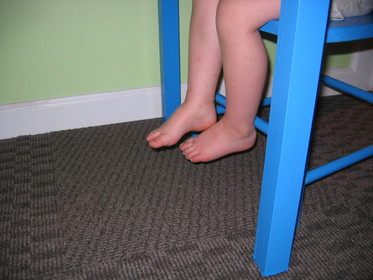
Anyway, the kids love the table. Max has already built elaborate cities on it with his blocks. And seriously, is there anything cuter than the way kids’ feet dangle off chairs? I can’t wait to post about whatever his next project is (since I seem to have no time to do my own projects—my crazy deadline is almost over though!)
Quick addition to this post: 365 Days of Sewing is now running a giveaway of Sew Retro! Go here to enter the contest and read an interview with me.Anyway, back to the original post . . .Max’s toddler program wrapped up last week, and now he is off to summer camp (at the same school) this week. It’s just three days a week from 9 – 12, but any chance we have to get the kid outside and running around is welcome. He goes for two other weeks during the summer. Not enough, as far as I’m concerned. But my checkbook had the final say.
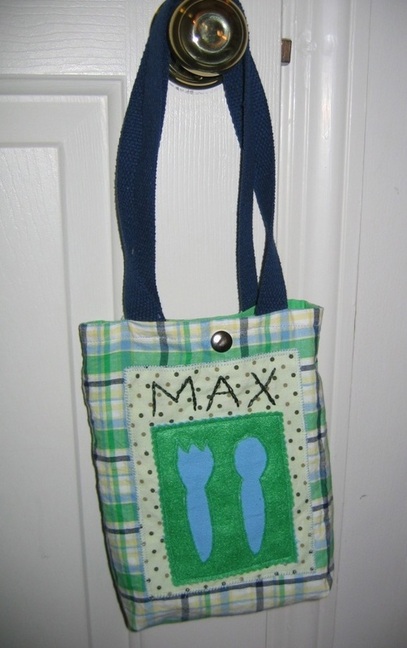
Since the camp includes packing a lunch for the kiddos, I figured it was time that Max had his own lunch bag. So of course, it seemed brilliant to embroider his name right on it so there’s no worry about mixing up lunch bags! 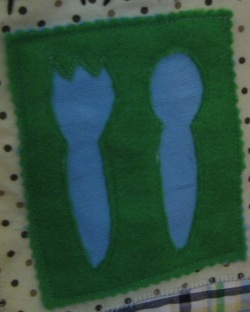 I also wanted to try the reverse applique technique on a small scale. I used a pattern from 100 Applique Motifs, but did the more traditional method of reverse applique—where you stitch on the backside of the fabric you want to show, and then flip it over and cut very close to the stitching on the fabric that’s in front of the motif. I’ve dabbled in this, but never done a project using this method. I love it, because it feels a little magical, like a slow unveiling of something. I used craft felt since I wanted a clean edge versus the frayed look I often gravitate toward.
It’s a super simple shape: I just cut front and back pieces, and then front and back lining pieces, at about 9 inches by 12 inches. I sewed up the sides and bottom of bag and lining, and made about a 1.25-inch gusset in each. I used the method where you insert the lining (turned right-side out) into the bag (turned wrong-side out, so right sides are together) and then sandwiched the handles in the seam. Then I sewed the top edges together, leaving about a 3-inch opening at the top for turning. Finishing is quick: Turn it, press it, slip-stitch the opening closed, top-stitch (if you want), and add a snap fastener (or sew on a snap or use Velcro). However, I realize now that I should have made the handles shorter (so the bag isn’t dragging the ground if he carries it).
I would love to see a dozen or so two- and three-year olds sitting around a table, pulling out goodies from their lunch bags and eating lunch. Actually, I’m 100 percent sure that I wouldn’t be able to handle such a scene. But I am thankful that there are wonderful summer camp teachers out there who are excellent at wrangling children and their yogurt-smeared faces and sticky hands.
Yay for homemade lunch bags, wonderful teachers, and summer treats!
I’ve been dreaming of the day that Max could play in my office/sewing room while I worked on projects. But it’s a room full of pins and scissors and computer wires and files and things that are generally not toddler-friendly. So although I’m always desperate to catch up on projects on the weekends, my sewing time is pretty limited during his waking hours, unless I sneak upstairs for a little while my husband watches him.
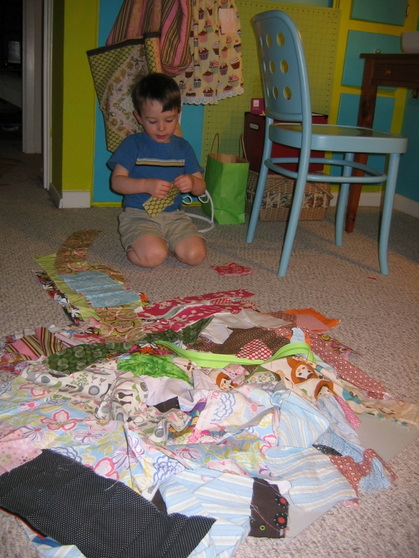
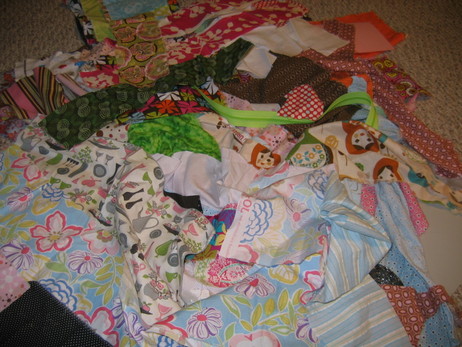
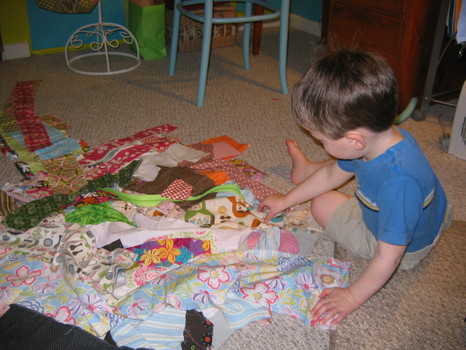
I should backtrack and say that Max loves anything to do with fabric, and is always desperate to get into my office. I often let him rifle through the scrap basket for a few minutes, hunting for a new treasure to add to his scrap pile. He loves to “help” me sew when I bring handwork downstairs into the kid-friendly space. This past Sunday morning, when I told my husband I was going upstairs for a few minutes to sew, Max grabbed his pile of fabric and ran up the steps after me. “I want to sew with you!” he cried.
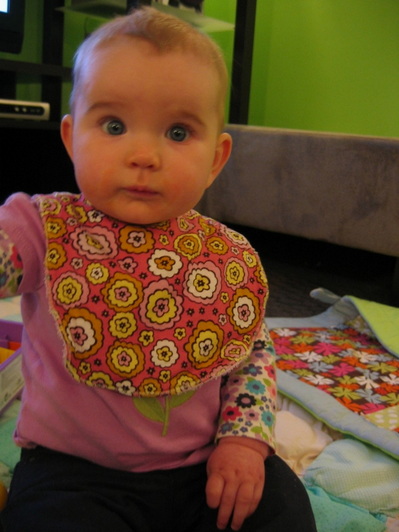
He promised me that he would follow my three rules: (1) no pulling fabric or books off the shelves, (2) no grabbing pins or scissors, (3) no grabbing computer cords or wires. I figured I’d give it a try. And you know what, it was pretty great! He had a ball with scraps and “making” a quilt. He actually followed all my rules (for the most part—I did have to remind him 1 or 2 or 14 times). Look at the beautiful pile he created! He was very proud. 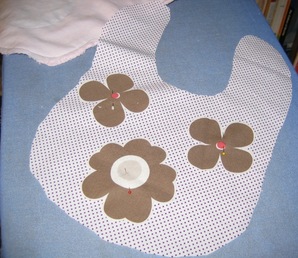 While he made his "quilt," I managed to start working on some pretty bibs for Georgia—a simple project that’s been on my to-do list forever, but I can’t ever seem to get around to. She gets stuck wearing her brother’s cast-off blue bibs with baseballs and dinosaurs. Of course, girls can love baseballs and dinosaurs too, but pretty girl bibs match her pretty girl outfits so much better!
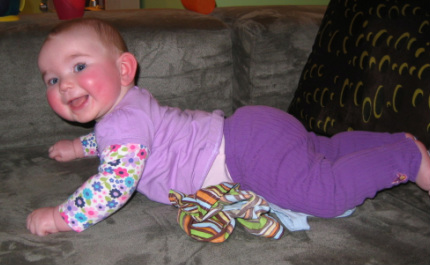
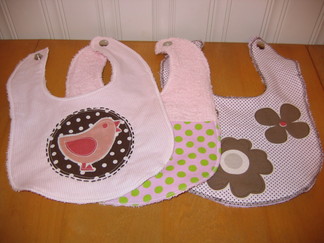 Altogether, I made four (three pictured here, and the one she’s wearing below). I created the pattern from an existing favorite bib (just the right size and shape for maximum drooling coverage, and not too tight around the neck). You can probably just look at it and figure out the directions yourself (super basic--a great "first" sewing project for a new sewing mama), but I created a quick bonus project here, with directions and a template you can download. I love that you can make the bib very simple (just a cotton print backed with terry cloth), or you can do fun appliques, which is what I decide to do on a few of them. You can also piece them. I just did two pieces. But you could sew small squares together and create an entirely patchworked bib!
I still don’t know that I’ll bring Max up here if I have a project that requires extreme concentration (or ironing, since I definitely don’t trust him anywhere near a hot iron), but it’s good to know that my boy and I can hang out a little bit up here and each do our thing.
 Pondering, pondering, pondering . . . (and always with that Ketteler smirk) I’ve always had ups and downs in my business (which consists of both magazine writing and copywriting). I’m used to this, and I’m okay with it. But 2010 was a doozey.
Let’s see, first, I had the opportunity to write an extremely personal essay for Whole Living. It’s the magazine piece I’m the most proud of (and it actually just won the American Society of Journalists & Authors award for best essay in the personal service category for 2010). Then, Sew Retro was published. The book represented something I had long wanted to do. It was a ton of work, but absolutely wonderful and I couldn’t have been more proud. Then, in September, I had another baby. What, you haven’t seen enough pictures of her? Well, of course you can see another one! So, 2010 should have been a great year.
But then, everything about my business fell apart. And I mean, fell effing apart.
I lost one client after another, for reasons completely out of my control. Editors got laid off. Freelance budgets dissipated. Projects promised themselves and then scampered away. Checks took forever to come. People I desperately needed to return emails didn’t return emails.
I found myself dipping into the first “only touch in case of emergency” fund in the fall. By the end of the year, I was looking at dipping into the second such fund, and one terrible day in January, I had to. I sobbed (quietly) on the phone with some investment banker I didn't know as I sold bonds from the back-up, back-up investment account. I could hear my husband with the kids downstairs, and in that moment, I felt like a complete and utter failure.
When I started freelancing nine years ago (almost to the day—I was laid off April 2, 2002, and decided to go into business for myself the next day), I always thought it seemed too good to be true. Why was I allowed to do something I loved so much—write—and make a really good living doing it? How were my husband and I allowed to live this charmed life, where he was able to stay home with our kids and I was able to support us by doing something I knew I was meant to do from the time I wrote my first article about Birchwood Drive (my childhood street) when I was eight years old? Surely, someone was going to come knocking on the door any day and tell me the jig was up.
In January of this year, I figured maybe the jig was, in fact, up.
But then, here is what happened. I interviewed a researcher for a story about exercise motivation. It was just one more story, nothing particularly special about it. But something in what she said struck a nerve. It goes like this: we create “possible selves”—the people we see ourselves being in 5, 10, 15 (or however many) years. Regarding weight loss and exercise motivation, researchers have found that the “feared-self”—envisioning yourself overweight, unhealthy, sick, diabetic, unhappy, and unable to do the things you love—is a motivating image for someone to shape up. But you know what else? The “hoped for-self”—where you imagine yourself vibrant, energetic, healthy, active, and doing everything you love—is motivating too. In fact, the hoped for-self is equally as motivating as the feared-self.
So, the researcher went on to explain, if both the negative vision of yourself and the positive vision of yourself are both equally as motivating, why wouldn’t you just choose the positive version?
This was the exact right a-ha moment, exactly when I needed it. Why not just choose the positive? Forget about weight loss. It’s a prescription for anything in life that can have two (or more) possible outcomes. Of course, fear will motivate you. But it may motivate you to make desperate decisions (like working with a publication you know treats writers like crap), which will just keep you in a cycle of fear and desperation (like stewing over the fact that your story wound up being killed/you didn't get paid/the piece turned out to be a nightmare). So why not just see the future you want, and make decisions based on that?
Something about that conversation actually changed a thought process in my head, and it made me realize that I was still in control. I could choose. It was a week or so after that when I met coach Darla LeDoux at a networking event, and a few weeks later, hired her to help me both grow my business and change my mindset. In the midst of all that, I got a huge new custom publishing client, who’s been a delight to work with. I’ve met a ton of new people (some are now clients, some are friends, and some are both) and I just closed one of my best months (March) ever. I don't think any of it is a coincidence. I think I finally stopped thinking the jig would someday be up, and as soon as I did that, it changed the way I thought about everything.
I still have moments when the feared-self pops up. Of course I do. Fear is primal. But I keep choosing the positive, the hoped-for thing. The thing, as Emily Dickinson so brilliantly says, with feathers.
Here’s to good choices and good tomorrows!
When Bonnie from Fishsticks Designs asked me if I wanted to try her great Charlie Tee & Hoodie pattern , I jumped at the chance! I’m always looking for toddler boy sewing ideas. (On that note, don’t forget to check in at Dana Made It for Celebrate the Boy Month!)
Anyway, Bonnie sent me this pattern for free, but I’m under no obligation to give it a glowing review. I don’t need obligation: this handy little pattern sells itself! I truly, truly love it and I think it’s probably my favorite thing I’ve made for Max so far. The Pattern
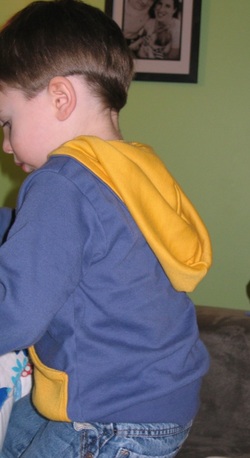
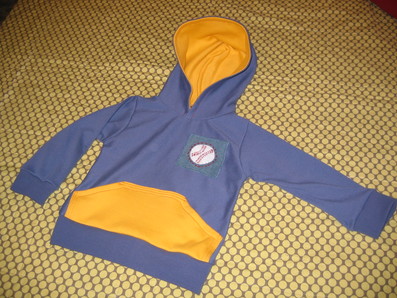
The pattern presentation isn’t fancy (a manila envelope with black and white sheets) [little update here: Bonnie just changed out the packaging! See it here!], but that’s unimportant to me. I’m after functionality and a good pattern, and this definitely delivers. First, it’s about five different patterns in one, because you can customize it for what you want: a plain tee (long or short sleeves), a color-blocked tee, or a hoodie (either outerwear or more like a tee-shirt). I chose the tee-shirt hoodie option, because I wanted Max to have something to wear around for spring that wasn’t too heavy.
She offers the patterns in different sizes (all the way up to adult), and my pattern is for infant/toddlers. There are six sizes: 12M, 18M, 24M/2T, 3T, 4T, 5T
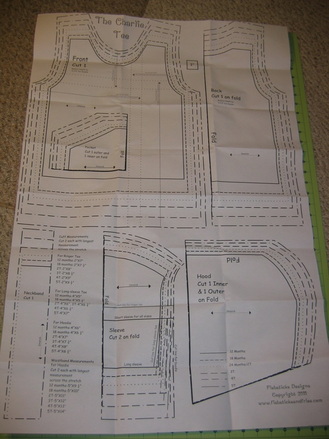
It comes with one big sheet of paper, with all of the sizes clearly printed. The best method is to trace the size you’re making. This way, you don’t have to deal with cumbersome paper when cutting out, and also, you can re-use (I anticipate using this pattern for many years as Max grows!). I used Pellon True-Grid (I just buy this by the bolt at Jo-Ann’s).
The Directions
The directions are very clear. I admit, I didn’t always read them word for word because once you know how to do something your way, you just go ahead and do it without really checking (though I don’t think my way differed from her way). But it would be very appropriate for a beginner. Also, she gives serge directions, if you’re using a serger (I wasn’t). There are accompanying pictures that illustrate the steps, and overall, it’s easy to follow. 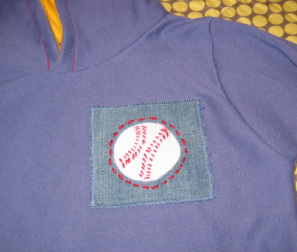
What I Customized
I decided to make a little baseball appliqué. So, this was my addition, there aren’t directions for this in the pattern. But there’s nothing to it: I just cut a piece of white felt into a circle and stitched it (by hand) to a square of denim. Then I took small stitches with a single strand of red yarn to mimic the stitches on a baseball (I actually had to Google images of baseballs to see what a baseball actually looked like!). I made a row of hand stitches with the red yarn just outside the baseball, and then I machine-appliquéd the piece of denim to the front.
I also added more top-stitching to the big yellow pocket, because I wanted to bring out the red. I top-stitched around the hood, too.
 The Overall Fit
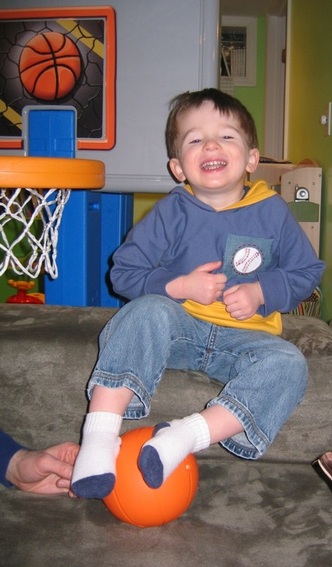
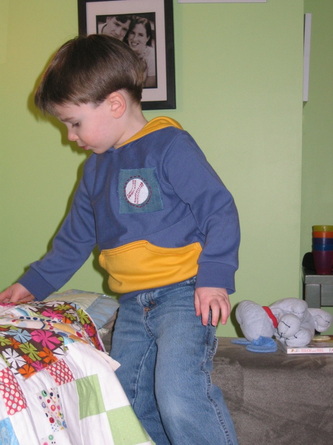
I made a 3T for Max, who is 2-1/2 years old, and a little bit on the small side (he’s like 35% percentile in height/weight). It’s just slightly big, but I like that, because there’s room to grow (I think it will still fit him this fall). It's a nice slim fit (and the waist cuff helps streamline it even more), but it's certainly not too tight. The only little thing: the neck opening is a bit snug. I like this from a fit perspective, but it does make getting it on and off him a bit tight (keep in mind, I did the hoodie version; I don’t think this would be an issue with the regular tee). It’s easier to flip it around and put his head in backwards and then flip it around to the front. When I make it again, I think I’ll cut the neckline just slightly bigger. But this is really no big deal.
The Charlie Tee & Hoodie is priced at $11.25. I know there are a lot of free patterns and tutorials online (which is awesome!), but it’s worth paying for a really great, well-designed pattern that you can use over and over again. I’ll certainly return to this one again, and will probably girl it up and make it for Georgia this fall, too! Oh, one last thing: If you're nervous about working with knits, check out Bonnie's blog post answering questions about sewing knits
So here we are in March! March is a little bit wonderful and a little bit rotten—it teases you with sunshine and then dumps some cold weather on you just for sport. But I’m keeping a good thought for spring!
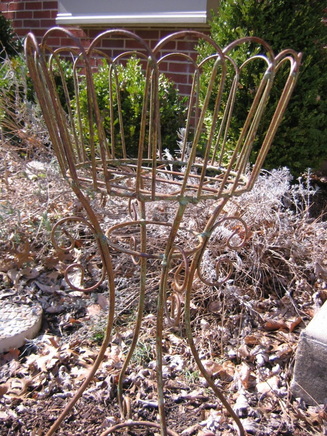
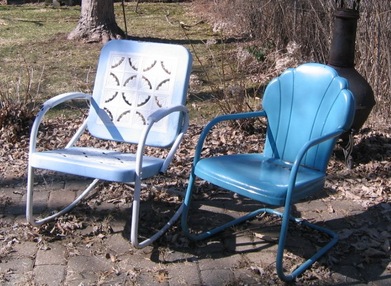
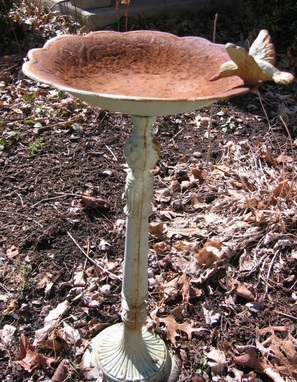
A few snapshots from my garden:
Tulips soon to make their entrance . . . .
A basket soon to be filled with annuals . . .
Chairs soon to be rocked . . .
A birdbath soon to be splashed in . . .
Despite its fickle weather, March is a great month for celebrations. I mean, it’s National Craft Month and Women’s History Month! Women, history, sewing: Could there be a more perfect combo? Hmm, if only there was a book about this or something, right?
Anyway, I was honored to write a guest blog about the history of women and sewing for the lovely Natalie over at the Craftzine blog. Check it out here, and put in your two cents if you get a chance!
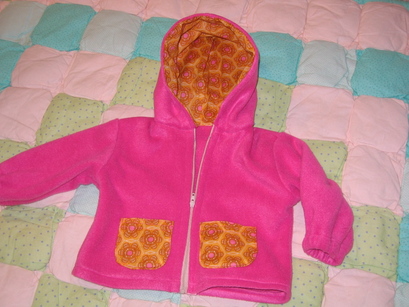
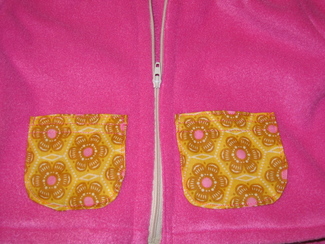
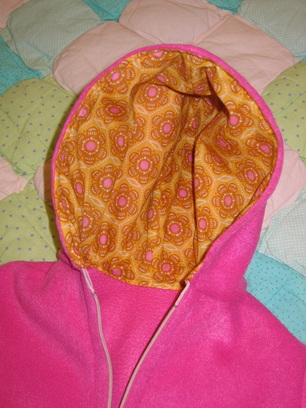
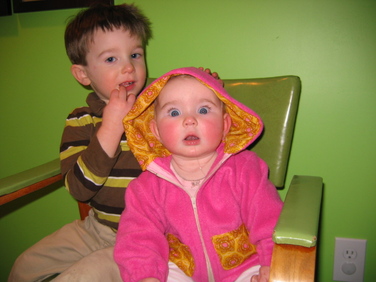
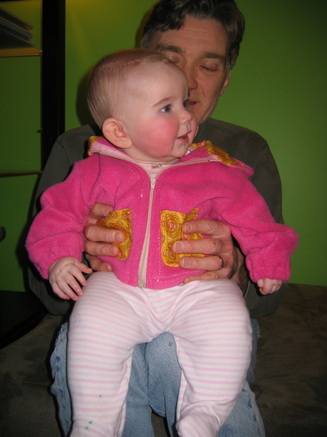
Also, I decided March was the month that my little baby girl should finally have, you know, a jacket (we just relied on blanket-bundling to get through the winter). I found a fleece as a remnant at Jo-Ann’s and it had pink prettiness written all over it. I used Simplicity pattern 5316 , but modified it some. I used an Anna Maria Horner print (one of the prints that came in the fabric stack) to make the pockets and to line the hood (the pattern doesn’t call for lining the hood, but I wanted the fun contrast). It’s an easy pattern to follow, and even if you’ve never done a separating zipper, the directions walk you through it very well (it had been a few years since I did one). It gets mighty bulky at the bottom, but just solider through it and even if it’s slightly crooked, it will still be okay. So, let's all channel spring and the amazing stories of women throughout history. And maybe go make a pretty spring jacket for yourself (or your kid) if you don't have one! It will make you happy, I promise.
|


 RSS Feed