Quick addition to this post: 365 Days of Sewing is now running a giveaway of Sew Retro! Go here to enter the contest and read an interview with me.

Anyway, back to the original post . . .

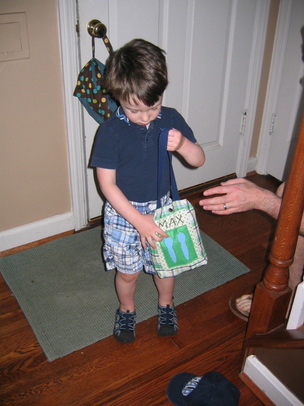
Max’s toddler program wrapped up last week, and now he is off to summer camp (at the same school) this week. It’s just three days a week from 9 – 12, but any chance we have to get the kid outside and running around is welcome. He goes for two other weeks during the summer. Not enough, as far as I’m concerned. But my checkbook had the final say.

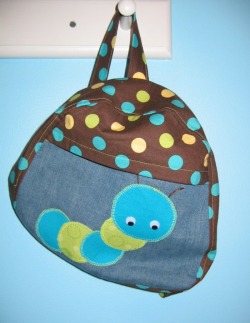
Since the camp includes packing a lunch for the kiddos, I figured it was time that Max had his own lunch bag.
Picture
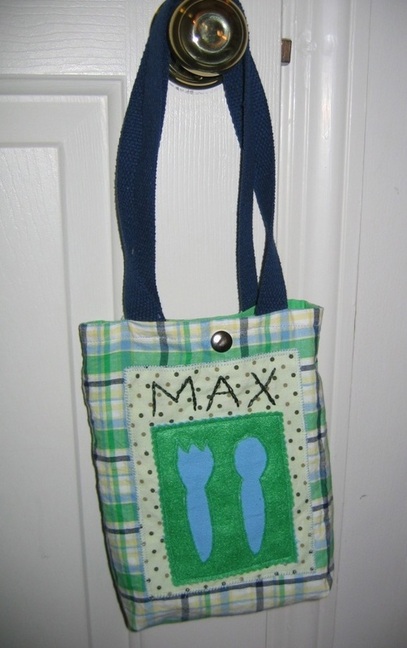
So of course, it seemed brilliant to embroider his name right on it so there’s no worry about mixing up lunch bags!
Picture
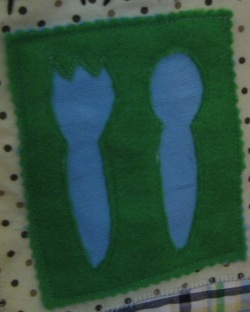
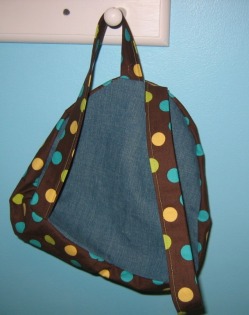
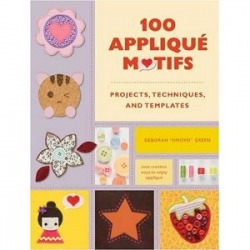
I also wanted to try the reverse applique technique on a small scale. I used a pattern from 100 Applique Motifs, but did the more traditional method of reverse applique—where you stitch on the backside of the fabric you want to show, and then flip it over and cut very close to the stitching on the fabric that’s in front of the motif. I’ve dabbled in this, but never done a project using this method. I love it, because it feels a little magical, like a slow unveiling of something. I used craft felt since I wanted a clean edge versus the frayed look I often gravitate toward.

It’s a super simple shape: I just cut front and back pieces, and then front and back lining pieces, at about 9 inches by 12 inches. I sewed up the sides and bottom of bag and lining, and made about a 1.25-inch gusset in each. I used the method where you insert the lining (turned right-side out) into the bag (turned wrong-side out, so right sides are together) and then sandwiched the handles in the seam. Then I sewed the top edges together, leaving about a 3-inch opening at the top for turning. Finishing is quick: Turn it, press it, slip-stitch the opening closed, top-stitch (if you want), and add a snap fastener (or sew on a snap or use Velcro). However, I realize now that I should have made the handles shorter (so the bag isn’t dragging the ground if he carries it).
Picture
Picture
I would love to see a dozen or so two- and three-year olds sitting around a table, pulling out goodies from their lunch bags and eating lunch. Actually, I’m 100 percent sure that I wouldn’t be able to handle such a scene. But I am thankful that there are wonderful summer camp teachers out there who are excellent at wrangling children and their yogurt-smeared faces and sticky hands.

Yay for homemade lunch bags, wonderful teachers, and summer treats!
 
Picture
Max with his first backpack
The school supplies are neatly stacked as we anxiously await our first day of pre-school! Without a doubt, Max is most excited by his new backpack. I wrote about it a few weeks ago when I was first planning it, and I have to say, I love, love, love how it turned out! As I mentioned in the previous post, I used this toddler backpack pattern from Indietutes (free, but she accepts donations via PayPal, if you’re so inclined). I definitely recommend this pattern, because it has a super simple shape, without snaps or zippers or anything complicated for a 2-year-old to negotiate. It’s on the small side, and I can see that we might have trouble fitting in larger pieces of artwork, but still, I wanted something that Max could easily carry on his back and not feel weighed down by—so from that respect, it really is the perfect size for a toddler.
Picture
  I made the majority of the body out of denim, and then used a playful cotton polka dot print for the top flap, straps, and sides. Originally, I was going to line the whole thing, but once I fused all the interfacing to the pieces, I realized it was plenty sturdy as is. As for the pattern itself, the directions are very clear, and the pieces come together quickly and easily. I did modify the straps just slightly: she suggests folding the strap piece right sides together and turning, but I hate turning skinny strips of fabric, so I just pressed the edges up 1/4” and folded in half.  

I knew that I wanted to do a fun appliqué, and as I wrote before, I got the idea for the caterpillar appliqué in the book 100 Appliqué Motifs. I simply traced some circular shapes I had on hand (the bottom of a paperweight and the bottom of a bowl) to make the body and head. I admit, my only worry is whether the caterpillar is boyish enough. It is so challenging to sew cute—but stylish—things for boys (I’m hardly the first mom to complain about this!). If you stray from the well-traveled path of basketballs and dinosaurs, it’s easy to start second-guessing yourself, especially when your husband gives you that look. (Anna Maria Horner has a great post about her husband teasing her about the fancy pants she makes for her one-year-old. But I’m sticking with my little lime and aqua caterpillar!

Picture
The view of the back
 
Picture
The Clifford quilt for my big boy!
Three things are on my mind today. First, my baby slept in a big boy bed for the first time last night! All went well, except he somehow fell out (even with side rails) around 7:15 this morning, and then didn’t go back to sleep. Though he did lie there and talk to himself and play with his animals for almost an hour while I tried to go back to sleep in my room. I’m counting it as a success that he didn’t get out! He’s been super excited about the bed because I made him this Clifford-themed quilt, and gave it to him for his 2-year birthday a few weeks ago. Clifford is a big deal at our house, and Max was completely giddy last night when he finally realized that the Clifford quilt was going on his very own big boy bed!
Picture
I used both raw-edge applique and embroidery to make the Cliffords and Clifford-themed stuff.
I hope to do a tutorial about the quilt (I did both appliqué and embroidery). I’ll definitely offer some how-to in some fashion though, either actual templates or an explanation of how to make templates and transfer them.

  Secondly, I’m working on Max’s backpack; he starts preschool in a month. How is it possible that my little boy is both sleeping in a regular bed and starting school?! We picked out the fabric for the backpack this weekend (he’s completely obsessed with saying “backpack” and every time he hears the word “school,” he shouts: “Backpack! Backpack!”).
Picture
   I’m using a free pattern from Indietutes  and doing a caterpillar appliqué from 100 Appliqué Motifs  by Deborah “Ismoyo” Green  (I can’t recommend this book enough for instant appliqué inspiration!). I'll post more on the backpack after I finish it.

And lastly, tonight at 7 p.m. is my book signing at Joseph-Beth Booksellers in Cincinnati! I have the feeling you have when you’re throwing a party and you think, “what if no one comes?” At least I know my family will be there! I’ve been so impressed by everything the wonderful people at Joseph-Beth have done to promote Sew Retro and the event tonight. I’ll be back with a full report on how it went!