Bonus Projects

Holiday Stockings
This felt stocking is a fast and easy project to get you in the holiday spirit! Create personality and festive cheer through creative embellishments, like ribbon, rickrack, fringe, or sequins.
What You Need
Prepare Your Pattern Pieces:
Cut Your Pieces
Assemble Your Stocking:
This felt stocking is a fast and easy project to get you in the holiday spirit! Create personality and festive cheer through creative embellishments, like ribbon, rickrack, fringe, or sequins.
What You Need
- 1/3 yard of felt
- 1/4 yard (regular or fat quarter) of a contrast fabric
- Scrap of a second contrast fabric
- Scraps of ribbon for embellishment
- Downloaded pattern piece templates
Prepare Your Pattern Pieces:
- Print out stocking and heel patch templates.
- To use the stocking template, you’ll need to add 6 inches to the top. Measure on fabric and mark with a fabric marker, or measure and draw a 6-inch by 6-inch square on a piece of paper, cut it out, and tape the piece of paper to the top of the template.
Cut Your Pieces
- From felt: cut two of stocking template (with the 6 inches added)
- From contrast fabric #1: cut a 12-inch by 8-inch rectangle (for the cuff)
- From contrast fabric #2: cut one of heel patch template. (Mark which side goes next to heel.)
- Cut a few pieces of ribbon or rickrack to decorate your stocking. If you use ball fringe, you may need to trim away some of the fringe near the sides (to make room for your seam).
Assemble Your Stocking:
- Decide which way you want your stocking to hang—that determines which piece is your stocking front.
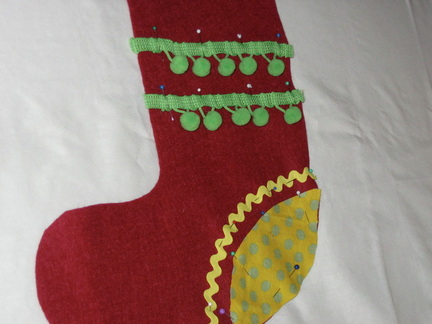
- On the front piece, lay out your pieces of ribbon how you want them. Get as creative as you want with the arrangement. Pin your ribbons and/or rickrack in place. (Picture #1). Stitch by machine (or by hand).
- Pin the heel patch to the heel. Use a zigzag stitch to attach the top side of the patch (you won’t need to stitch the bottom edge because it will be secured when you sew front to back).
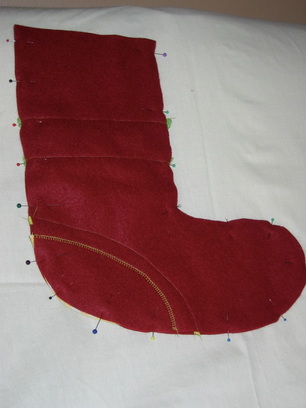
- Once you have the front the way you like it, pin front to back (leave top open), right sides together, and stitch, using a 1/4-inch seam allowance. (Picture #2)
- Clip curves (make tiny triangle cuts in the seam allowance to help the curves to lay smoother).
- Fold the 12-inch by 8-inch rectangular piece in half longwise (12-inch sides meet), with WRONG sides together. Press.
- Now, pin short ends together and stitch. (You now have a circle with one folded edge and one raw edge.) Press seam open.
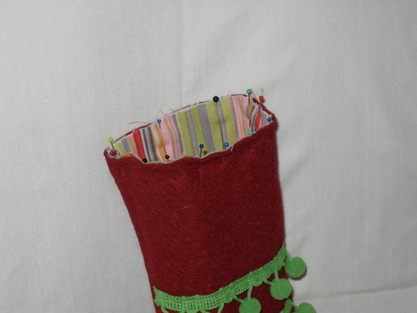
- Turn cuff so that your seam is inside. Put cuff inside of stocking, RIGHT side of cuff to WRONG side of stocking. The raw edges of the cuff will line up with the raw edge of the stocking. Position the cuff seam so it’s in the middle of the back, because that’s a good place to “hide” it. (Picture #3). Stitch. (Hint: keep smoothing the fabric as you stitch, so it doesn’t pucker.)
- Turn cuff to outside and press.
- Paint a name on the cuff using puffy paint or paint pen (Tip: practice first; also, use a disappearing ink fabric pen to write the name first, so you can trace over it.)
- Tack a loop of ribbon to inside top corner for hanging.


