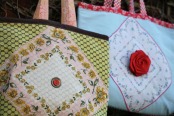
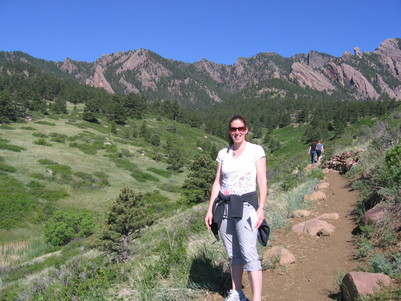
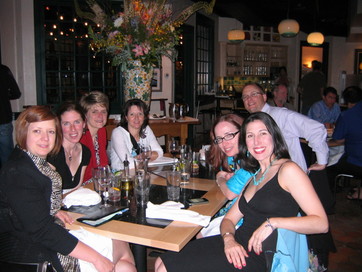
Thanks for everyone’s nice comments about my Special Spaces pillows! I really enjoyed being part of such a great team. And, of course, I greatly cherish that comment from Bailey’s mom. Continuing on with my crazy week, the day after the Special Spaces makeover, I got on a plane to Denver for a much-anticipated business retreat at the Omni Interlocken Resort (I’m seriously going to write them a love letter for their exceptional service).  I’ve written before that I’ve been making lots of changes in my writing business as part of my work with my business coach, Darla LeDoux, and the Mastermind program that I’m a part of. This retreat was a chance to gather with the four other members of my group, along with Darla, to share our progress (and get and give feedback), do more planning, and learn new strategies. We also got to take this fabulous hike. Look at those mountains! There may have also been a ride in a limo to a great restaurant in Boulder.
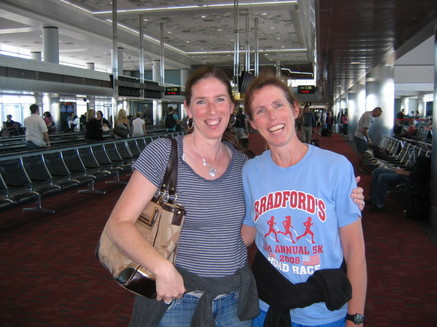
Well, and a massage this morning, followed by a glorious soak in the hot tub and a dip in the pool. Oh, and how random is this? My sister, Claire—who lives in New Hampshire—just happened to be passing through the Denver airport with her son (my nephew) Pete, this afternoon when I was leaving. They were on their way to hike the second half of some insane 480-mile trail somewhere around Denver. She lives 2,000 miles away from me and I hardly ever get to see her—and her plane just happened to be arriving at the gate directly across from my gate 10 minutes before my plane to Cincinnati left! Do you know how BIG the Denver airport is and the odds of that? Not to mention all the delays she had to experience before getting to Denver to even have us at the airport on the same day at the same time (her coming and me leaving). We knew that morning there was a chance we might see each other, but I never thought all of the pieces would fall into place for a 5-minute visit, but somehow they did. What a sweet little gift. But seriously, it was 93.37% work (Allen, if you are reading, it was 100% work). Awesome work, actually. When you are working in your business, it’s rare that you get to step back and think deeply and seriously about the direction your business is heading, about your goals, and about how—step by step—you are going to make it happen. And then, you have five other people to hold you accountable and stare you down (lovingly) if you don’t do what you say you’re going to do.
I am going to do what I say I’m going to do. That’s a promise.
In fact, I can’t wait to share everything I’ve been working on (soon!). I think I’ve found a sustainable way to bridge my writing business with my involvement in the craft industry. I mean, Sew Retro was one way I did that, and of course, this blog does, too. And I love this space and the book is one of my proudest pieces of work.
But I’ve got even more exciting things in mind for the future.
 I must give credit to my friend, Brian, for taking this picture!
When I signed up to volunteer to be part of the sewing team for Special Spaces Cincinnati, I didn’t know that it would be in at the tail end of my busiest week of the year. I’ve been up every night until about 1:30 a.m. trying to get work done. So when the alarm went off Saturday morning (after another late night), I admit, I groaned a bit.
But once I got there, I knew it was going to be a very cool day. We were giving 7-year-old Bailey a brand new princess bedroom, as part of Special Spaces—a national organization that does one-day bedroom makeovers for children dealing with life-threatening illness. The Cinci chapter is brand new and Bailey’s room was their first makeover. Bailey has been dealing with leukemia for the past year. She’s been sick, but very, very brave. She has three other siblings (including a 9-month old baby brother, same age as Georgia), and she shares a room with her 3-year-old sister, Rachel. A friend of the family nominated her for the room makeover.
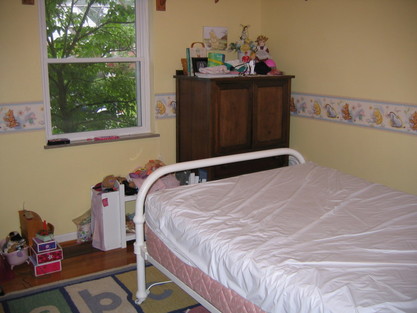
Thankfully, Bailey is doing very well. I found out Saturday that her last scan was cancer-free, and she is in the maintenance phase of her treatment. But after everything Bailey has been through, she deserves the bedroom of her dreams, to recover in, and make more dreams. Here is the before shot of the room . . .
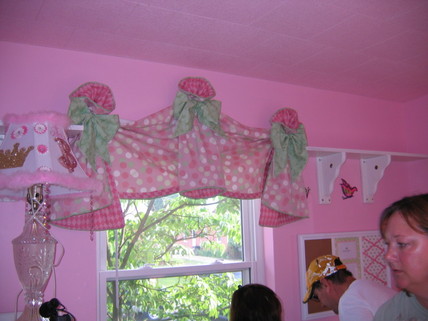
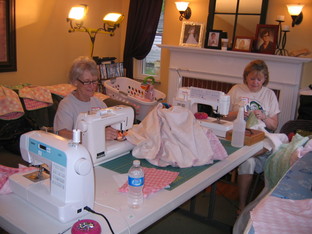 I signed up to be part of the sewing team, headed by Robin Nielsen, who owns Stitch Studio here in Madeira. We had the task of doing all of the sewing, including two quilts, a handful of pillows & shams, and the window treatments. Robin did 90 percent of the sewing herself ahead of time—like the very intricate window treatments. She is absolutely amazing! (Here they are before installation.)
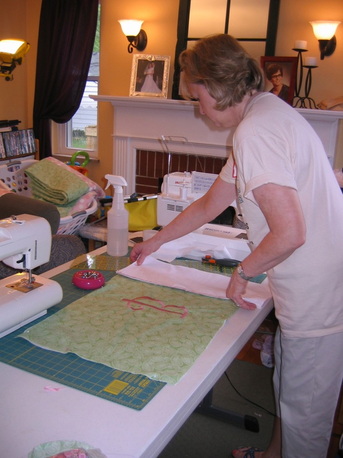
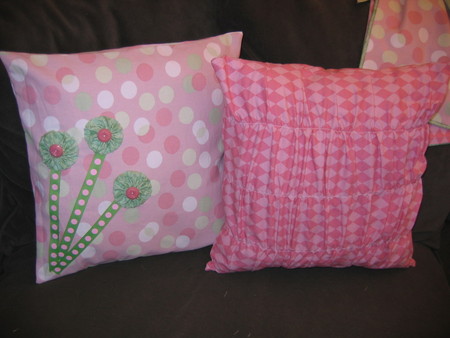
That's Robin cutting one of the adorable monogrammed shams. Her best friend, Leslie, also helped her out. I had such a fun time listening to Robin and Leslie talk about all of their sewing (and other) adventures over the years. They are really a lovely pair, and made the day even more enjoyable. My contribution was these two pillows (I used the gathering technique from the Mod Pillow for one of them, and decorated the other with yo-yos).
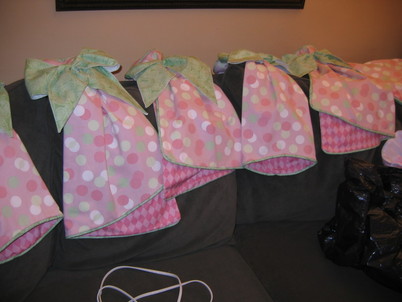
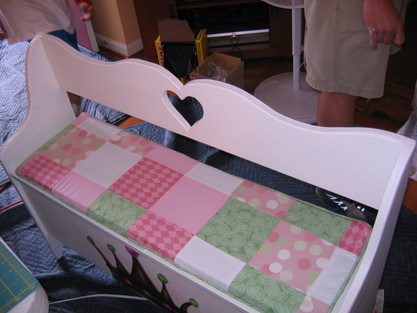
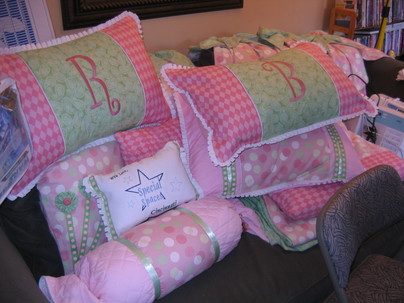
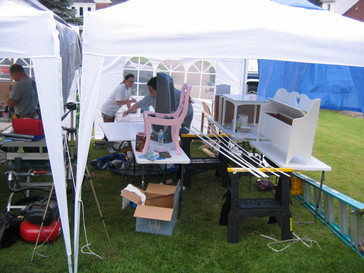
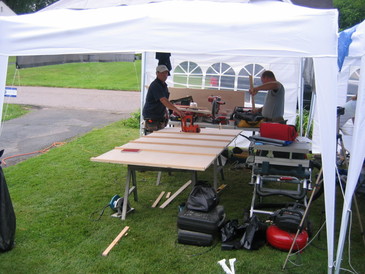
I also did the patchwork on the cover for the bench cushion below. It was so fun to watch the couch pile up with pillows throughout the day. All day long, the carpenters and painters and craft team were in and out, furiously working on things (there were about 20 volunteers in all). Robin, Leslie, and I were in our own little Zen, just sewing and chatting. Serious stuff was being built and painted in the tents out front (I heard the hum of power tools all day.) I’d always wondering how those one-day makeovers actually work. How do they get everything out, reconfigured/painted/built, and then everything back in before the family comes back?
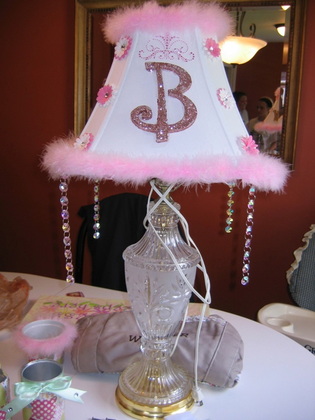
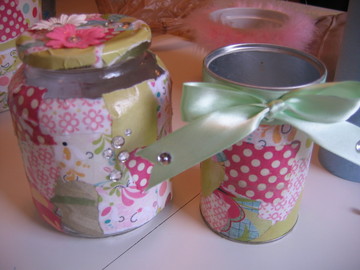
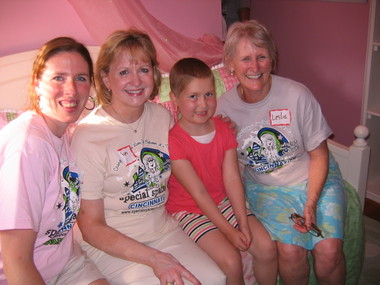
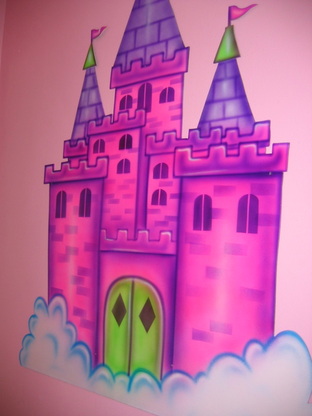
I know the answer now: it’s a ton of really, really hard work, and it reaches a panic mode about 10 minutes before the family is due back. There was so much to do in those last minutes--so many parts to coordinate and things to move in. I can’t even believe all the great details the team did, like all of these adorable pieces! But truly, that moment of the reveal was probably one of the coolest moments of my adult life. I wasn’t in the room for the reveal—there were too many volunteers. But I could hear Bailey squeal, and I also got to see it on the news last night (there were three TV crews there). And I got to go in after with the sewing team and show her everything we did. Here I am with Robin, Bailey, and Leslie.
I can’t believe the amazing people that made everything come together. I had such a small role to play, but it felt so great. I’ve been thinking for some time that I want to use my sewing skills to give back, and I feel like I’ve found a very wonderful cause.
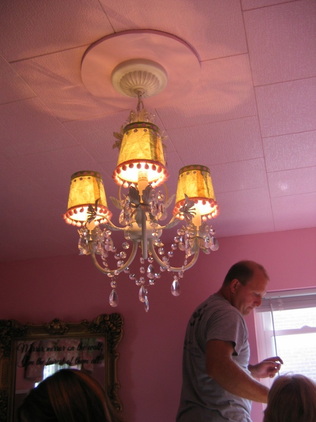
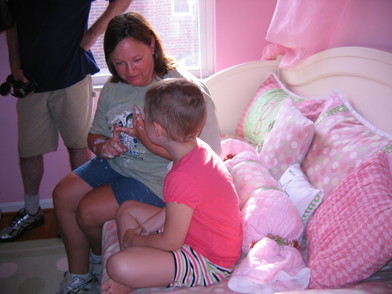
A few more pics . . .
I know, I know . . . you're all eagerly waiting (I had to go running, take a shower, and eat lunch, and I missed the noon deadline!). I just picked the winner at random (literally, I scrolled up and down the comments with my eyes closed and just clicked and then opened my eyes).
The winner is . . . Julie Witt! Julie says that her goal is to design her own pattern, in either sewing, knitting, or crocheting. I think you should take that as a challenge, Julie, and make it happen! In fact, I loved reading all of your goals. What an inspired bunch! Thanks for sharing your goals, and I hope writing them down (on a public forum) gives you the push you need to accomplish them.
These giveways are my favorite thing ever, so I hope to keep doing them.
Julie, I'll be in touch via email about getting you your winnings.
Have a great weekend everyone!
Judi
When I think of Bari J. Ackerman, my brain goes to layers and layers of loveliness. Her work is so intricate and her use of color so joyful that looking at her blog is often my reward after a day of stressful work (her logo alone calms and inspires me). 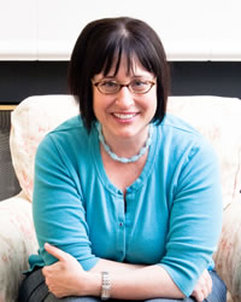 Her first book, Inspired to Sew, (Stash Books) came out earlier this year (do you have it yet? Why not?! Go order right now!). In addition to her line of patterns, she also designs fabric (her next line, Paris Apartment, will be available in July). What I particularly love about Bari J. is that she has this terrific eye for vintage that just feels right and feels real and usable (she talks about this in her Q&A—I love what she says about vintage purses). When I look at her stuff, I am reminded that color and texture and playfulness and nostalgia aren’t just concepts for Milan runways or boutique windows: they can be tenets of everyday life.
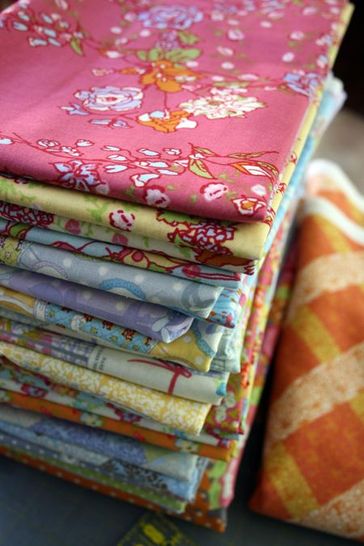
Bari J. is generously offering one of her gorgeous patterns (the winner can choose any one of her patterns, all listed here) and a stack of 8 fat quarters (it will be a random mix), which might look something like this . . .
So, enjoy the Q&A with her (it’s very insightful—especially for people who dream of designing fabric), and enter to win Bari's stuff, as well as a copy of Sew Retro, by leaving a comment between now and Thursday, June 16th, at noon EST. I won’t disqualify you if your comment is just “hey, cool,” but in the spirit of Bari J’s story (see question #1!), I’d love to know what goal (sewing-specific, business, design, personal—whatever) you still have for yourself, whether you’re 23 or 35 or 64 or 82.
Q: I’m always fascinated how people come to fabric and pattern design. What is your background, and what made you switch from just making bags to designing fabric and patterns?
Bari J.: Just out of college I worked as a copywriter and graphic designer in advertising. After I had kids and stopped working I started puttering around making jewelry and collage art from found objects, which I sold to local boutiques. Soon thereafter I found sewing and was immediately hooked. Once I had my website up and going I found I was doing a lot of graphic design again and that’s when the idea for surface design, and in particular fabric design, began. It was also pretty clear to me after I started my blog that although people loved my bags and accessory line, my readers were DIYers. I can’t even tell you how many times I was asked for a pattern. The next logical step really was sewing patterns.
Truth told, making the jump to fabric design was not easy. I’d done graphic design and I knew the computer software, but I had no idea where to start. I didn’t know how to make repeats and I didn’t trust my drawing skills. It’s funny because my mother painted my whole life. But having come from a large family, each sibling sort of takes their role and sticks with it. My brother and sister drew and painted a bit, so I was the actress/singer in the family. It’s interesting how family dynamics work. It never even occurred to me that I could draw until I finally tried at 35 years old. In order to design fabric, I had purchased a graphics tablet for the computer. Once I picked up the pen and got going, the ideas kept coming. I can’t even tell you the number of hours I practiced drawing or the number of designs I erased, but eventually I had a collection ... and I’d figured out the elusive pattern repeat.
Right about that time, Spoonflower, started its beta program. So I wrote them and asked to be a part of it. They digitally printed the first collection for me, I made a quilt and other items and off I went to quilt market with several appointments ahead of me with fabric companies. At the time it was still unheard of to have actual fabric samples (now it’s old hat, everyone is digitally printing), so it was a blast to show what you could actually do with the designs I’d done. Everyone wanted to know how I got the fabric printed. Things sure change fast, huh? That was October 2008.
Q: Paris Apartment is your next collection, correct? I love the previews I’ve seen! What inspired this collection, and when (and where) will it be available?
Bari J.: Thank you. I’m thrilled with this collection. It really came about just through doodling and daydreaming. I have always wanted to go to Paris, but I’ve never been. As I was drawing bits and pieces out, I realized it all was part of my elaborate fantasy. This collection is how I imagine I might live if I were to have my own Paris Apartment. It is printed by Lecien and will be available in stores in early July all over the world.
Q: I’m also fascinated with how people arrive at writing a craft book, especially since it’s usually a labor of love. Inspired to Sew is so beautiful. What’s the backstory?
Bari J.: Thank you again. When I arrived home from that very first quilt market, having just sold my first line, Full Bloom, for licensing, I received an email. I was riding pretty high on the success, so in all honesty I was waiting for the sky to fall. You know? That feeling of, it’s all so good, something bad is bound to happen any minute. (Is that just me?)
At any rate, I received an email from the acquisitions editor at C&T that she’d been reading my blog and it turns out I live nearby and would I like to meet for lunch and chat. I was so completely convinced that it was a joke, I nearly deleted the email. I went back to read it a couple days later, and responded, “sure, I’d love to meet and talk about it.” And with a laugh, I forgot all about it. In the end, obviously, I did end up taking that meeting. It turned out C&T was about to launch their Stash Books imprint and it was just the absolute perfect opportunity.
It was, in fact, a labor of love for me. I, again, had no idea how I’d proceed, or if I could even do it, but it all turned out just exactly as I’d imagined, and as an added benefit, it is what propelled me into producing my line of sewing patterns.
Q: I love your tagline: Vintage inspired design for your modern life. What does that mean for you—in both your day-to-day life (what I like to call “the slogging through”) and your creative life?
Bari J.: Throughout my life, I’ve had a love of old things. I think I arrived at it through my mother who also has that aesthetic. However, you just sometimes can’t live with old stuff. In fact, old handbags are most seriously one of those things that are hard to live with in. They can be smelly for starters, something that always bothered me. And for another, they just don’t have modern conveniences. So, the tagline came from the desire to make handbags that were vintage modern. Something with an old-world feel, but with modern conveniences such as added pockets, etc. And that of course easily translates across all of my design whether it be fabric or sewing patterns.
Q: I love your post about the Springtime in Paris clutch, and how many tries it took to get it right. Often times, people don’t see all the work that goes into getting something right (and the mistakes made!). What is your process for developing patterns? Do you see it all in your head, or get your best ideas in the shower, or sketch it out, or just start cutting fabrics, etc.?
Bari J.: I’d say all of the above although I have been know to cut straight into fabrics without a plan which is something I have to force myself not to do.
I do see what I want in my head but sometimes it just doesn’t make sense in reality, so for me, I try to always make a muslin version first after I sketch and work out the measurements, etc. A little restraint in diving right into the real fabrics tends to go a long way for me.
Q: Your work is so rich in color and layers. Does it get tempting to keep adding more, especially when you are working with fabric you love? How do you edit yourself?
Bari J.: Oh boy, I have a terrible time editing. I think it’s just an instinct as to when to stop. I hear my mom saying: “Don’t you think that’s a little bit ‘unga-patchkie’?” Which is Yiddish for over the top or over done.
I do think more is more though. I’ll always say that.
Q: I find that designers are super friendly and the crafting community is a warm one. Still, there is a lot of competition these days as more and more independent designers are producing lines of patterns and fabric. Does it ever feel overwhelming? How do you stay focused?
Bari J.: I’ll tell you what, it IS overwhelming, there IS a lot of competition, but it also is a very warm community and I do think we all try to support one another. There are people who are very giving who have helped me along the way, and I try to give that in return. I do also try to stay out of the blog-o-sphere when I get that overwhelmed “I’m never gonna make it feeling.” And I had a designer say to me once that she just tries to “stay in her lane.” I’ve adopted that attitude.
Q: Lastly, what’s next for you in the short-term and the long-term?
Bari J.: I’ll be working on a new fabric line in the coming weeks for next spring and also a book proposal. And I’ll be teaching at the Sister’s Outdoor Quilt Show’s, Quilter’s Affair next month and then I’ll be in Utah teaching at the Sewing Summit in October.
Long term, I intend to license my designs on other surfaces ... hopefully some home goods and paper. All fun stuff. I really love my job.
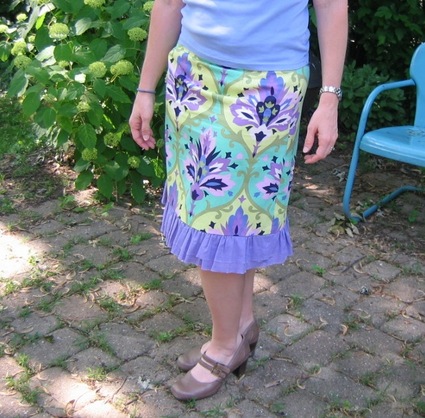
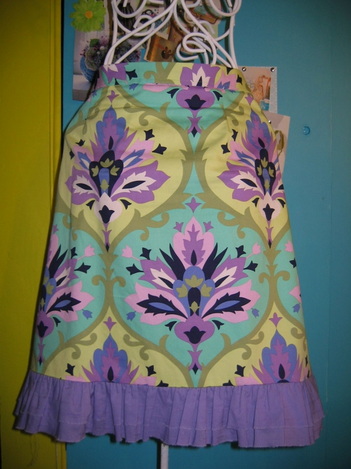
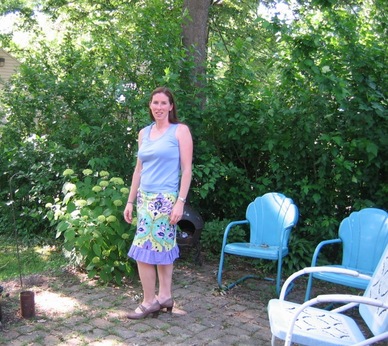
I love skirts in the summer, and in my dream life, I would make a skirt a week! But my skirt-making time is limited these days. Still, I had time to make this one, based on the Saturday Afternoon Skirt in my book. I actually intended to make the A-line pattern. But once I cut it out, I realized that the home dec fabric I picked out (Amy Butler’s “Trumpet Flowers”) was too heavy and didn’t look right as an A-line. It was much better suited as a straight skirt, with a full ruffle at the bottom. So, I followed the directions in my book, but instead of angling the side seams out on each side, I just made the seamline go more straight down from the hips. 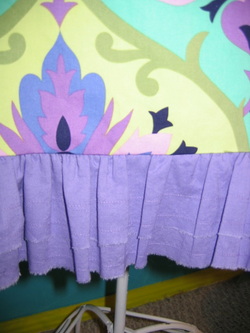 For the ruffle, I used a quilter’s cotton broadcloth from Jo-Ann’s. I wanted the ruffle to be extra full, so I made it two layers (the top one is 3 inches long and the bottom is 4 inches). To get the measurements, I measured around bottom of skirt and doubled it, to allow for gathering. I think that was about 90 inches, but since I was seaming together two complete widths of the fabric, which was more like 43 or 44 inches, the final circumference wound up being more like 86 or 87 inches, which is fine.Some more specifics:
- Since I wanted raw edge, I ripped my pieces. To rip, you just make a little cut at the selvedge and then start ripping. It will rip straight, and it gives a really nice evenly frayed edge. (Always rip a straight line first.) I ripped four pieces across the full width: two pieces that are 3-inches by 44-inches (or whatever the width wound up being after washing) and two pieces that are 4 inches by 44 inches.
- It’s easiest to layer the pieces and take the side seams at the same time. Place each 3-inch piece on top of each 4-inch piece and stitch together at each end (right sides together, so 3-inch piece to 3-inch piece). You’re creating one big circle.
- I wanted some stitching detail on the ruffles for a textured look, so I took a few rows of straight stitches (two rows on the top layer about one row on the bottom layer).
- Then I pinned the layers together at the top and took a gathering stitch. I started at one side seam, stopped he stitching when I got to the other side seam and then resumed on the other side of the seam.
- Then, with right sides together, I matched the side seams on the ruffle and skirt and starting gathering. I evened out the gathers, pinned, and stitched.
- It takes a good pressing to make the ruffle lie flat. I love the finished effect and the fullness of the ruffle layers.
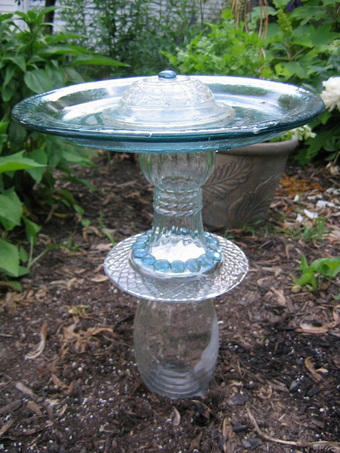
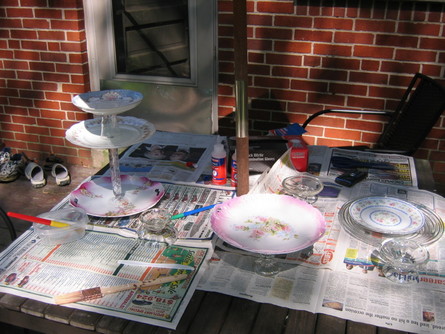
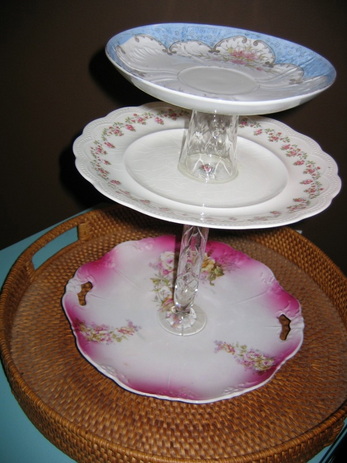
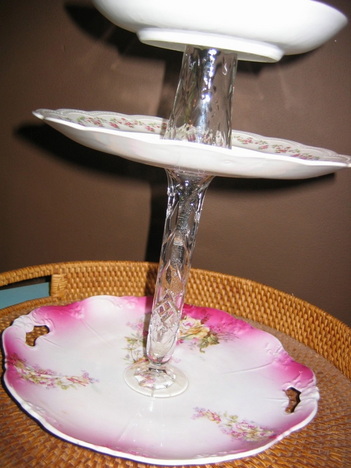
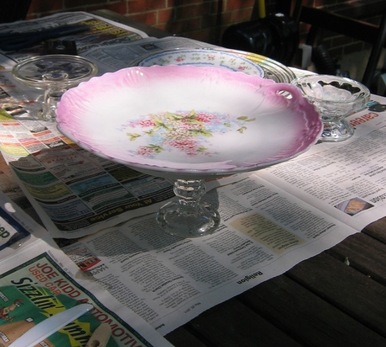
Something awesome is going on with old plates, beat-up brass candlesticks, and orphan glassware. My sister, Laura, and I made this observation at my little neighborhood art fair last month, where I snagged this unbelievably cool birdbath made from old glassware ($35! The woman who made it could have charged at least double that I’m sure). It’s very sturdy (the base is buried into the dirt a few inches), and weathers well, as long as I bring it in before the first frost. But we saw lots of cool examples of repurposed china that day, and I’ve seen them circulating around, too. I’d seen the idea for making a 3-tiered cake stand from vintage china on Readymade’s back page a few months ago, and showed it to Laura. She and I started collecting plates, candlesticks, parfait glasses, and shot glasses. Since Monday was a holiday and we needed something fun to do, we decided to give it a try. I searched around to figure out what type of glue to use, and found lots more inspiration, like this video from Threadbanger, this idea from The Mother Huddle (how amazing is that one she rubbed with glaze?), and these beauties from Wondering Chopsticks. 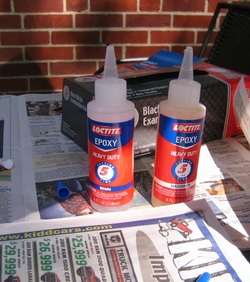 Basically, you just glue your layers together in whatever way makes the most sense. I didn’t bother with finding the exact center of the plate: I just eyeballed it. Some of the blogs talk about using Gorilla Glue or E6000. I used Loctite Epoxy 5-minute glue (bought it at Lowe’s). It consists of both a hardener and a resin, and you squeeze equal parts into a little mixing container and stir. It’s not hard at all. It dries really quickly, and it dries clear. So even if a little drips down inside your candlestick, it’s no big deal.
However, I just finished a story for a women’s magazine all about chemicals, and let me tell you what, I learned some scary, scary stuff. Resins and hardeners are seriously toxic (the label is pretty clear about that). They are full of nasty, nasty chemicals (think about what it takes to make something gel-like harden and permanently bond in 5 minutes or less). So definitely work outside (if you can), wear gloves, don’t breathe it in at all, and let the finished project off-gas outside for as long as you can.
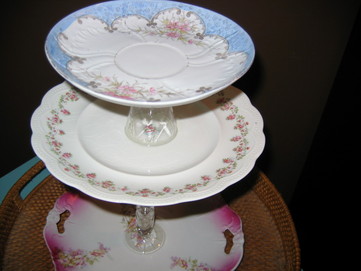
Anyway, I made a 3-tiered piece and Laura just did a single layer, because her plate was so darn pretty, she wanted to showcase it as is. I’m ready to go scavenge more plates and candlesticks and give some of these puppies as gifts!
|









 RSS Feed