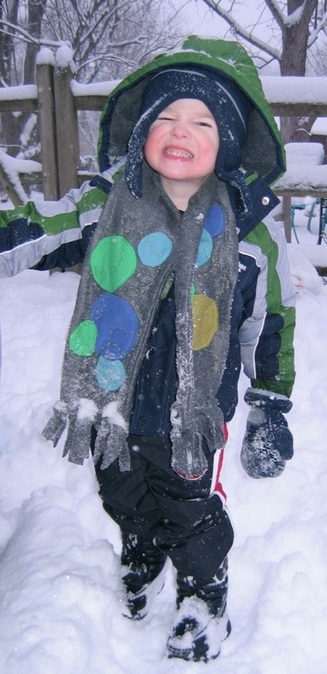
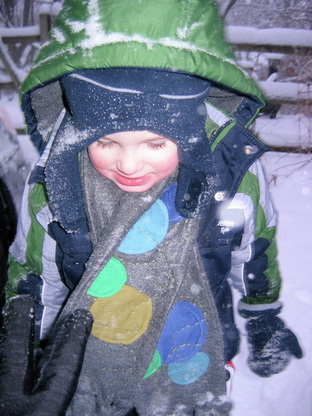
I don’t like winter, but I live in Cincinnati. So I’m pretty much out of luck. The only good thing about winter is the clothes—layers of fleecy, wooly, tweedy warmth. We bought Max his first real big boy winter coat a few months ago, along with hats, gloves, and boots. But it never occurred to me to get a scarf for him. So when I spotted this piece of grey fleece in my sewing basket one impossibly cold Sunday morning, I knew exactly what to do with it. The circles remind me of blowing bubbles, and I picked colors that would match his coat. I used all knit fabric, but you could use whatever is on hand (I actually think using a woven cotton and then fraying the edges would look really great). You could probably look at this and figure out intuitively how to do it. But here are the basic steps in case you want to know how I did it.
1. First, cut two pieces of fleece, each about 46 inches by 6-1/2 inches (or whatever length you want the scarf—I wanted some definite length).
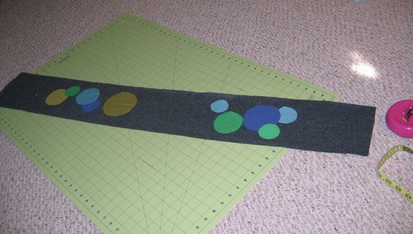
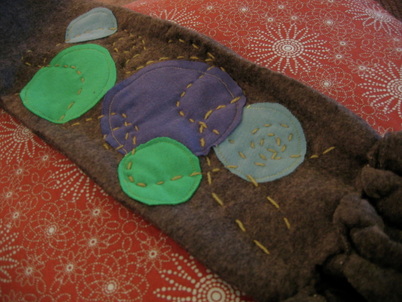
2. Next, cut out a bunch of circles of different sizes and in different colors (trace whatever you have on hand to create circles).
3. Arrange your circles on the scarf front; keep at least 1/2-inch on each side (room for seams) and about six inches at each bottom (for the fringe). 4. To appliqué, you can use Wonder-Under. I think my Wonder-Under was too old (and ruined from spending the summer in my hot attic office), so instead, I just dabbed some fabric glue to hold the circles until I stitched.
5. I sewed around the circles with a basic straight stitch, because I wanted a rough, uneven look. But you could also do a zigzag or appliqué stitch. Or if you want a clean-edged look, follow Anna Maria Horner’s directions for super circles.
6. Sew up the sides of your two pieces of fleece (right sides together). Leave both ends open.
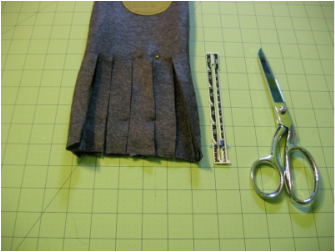
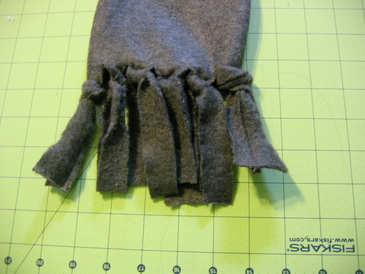
7. Turn and press well. 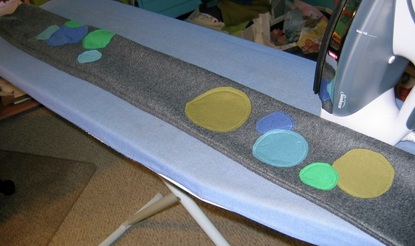 Don't forget to press after you turn so the scarf's side edges are nice and crisp. Ignore all of the crap in the background, please. 8. Align the rough edges at the ends and make four or five cuts about 5 - 6 inches deep, about 1 to 1-1/2 inches apart. 9. Tie the ends together to make fringe. Trimming the seam will help the end piece be less bulky. Don’t pull it too tight because it’s easy to stretch. My fringe is never perfect, so I just trim it until it’s even. (I’m sure there are more exacting ways to do this, but it’s for a wild toddler in the snow, so I’m not too worried.) 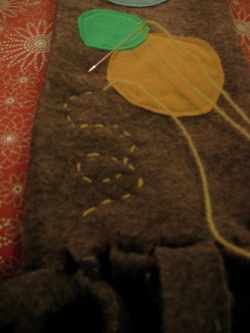 10. Add stitching detail. The stitching detail on the outside is actually my favorite part of this scarf! Last year, I won some pretty green yarn at Purl Soho (I was lucky enough to be there the day of their grand re-opening). I wasn’t sure what to do with it until I was trying to figure out how to add some more personality to this scarf. I decided to pull apart the strands and use a single strand (you pretty much have to use a needle threader to get it to go through the eye of an embroidery needle). I just freehanded the fun, curling stitches. (I’m not that great of a hand sewer, and it’s actually very easy to do.)
The hand-stitching looks good, and it holds the layers together. You could freehand some machine stitching of course, too.
May your winter be toasty!
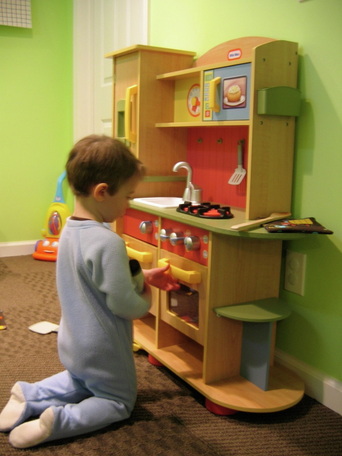
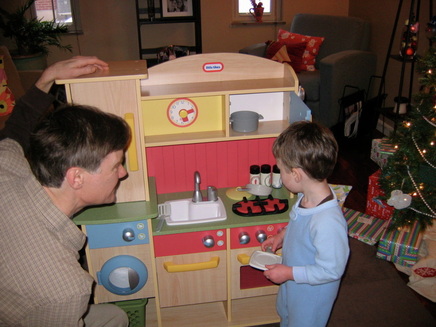
My essay, "Should Little Boys Play with Kitchens?" is up on Shelterpop this morning. It's about how domestic play is so often geared toward little girls, and how that is short-changing all of us in the end. This is a topic near and dear to my heart since (1) I have a boy, (2) I have a girl, and (3) I have a husband who is a stay-at-home-dad and does all of the cooking, and much of the housework. Our society, our expectations, and our notion of what men do and what women do has been changing for quite some time--mainstream toy manufacturers need to start taking notice! Would love to hear what other parents think!
 Throughout the year, I’m going to do a series of quick ideas for boys’ clothes/accessories (sometimes a free pattern, sometimes a pattern review, and sometimes a quick modification or easy embellishment). There’s no shortage of ideas out there for girls’ sewing (ribbon and rickrack and rosettes!), but the creativity needs a bit more coaxing for boys (at least in my opinion). One problem is that because pattern books and magazines show so few boys wearing even the gender-neutral stuff (like T-shirts), it’s easy to overlook these patterns and think it’s just all girls’ stuff.
Today, I’m offering the first two Boy Sewing Brainstorms!
Boy Sewing Brainstorm #1:
Make faux-layered sleeves for a t-shirt.
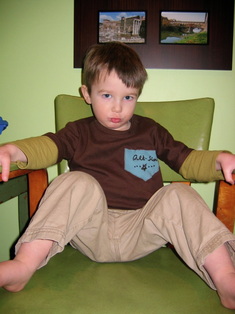
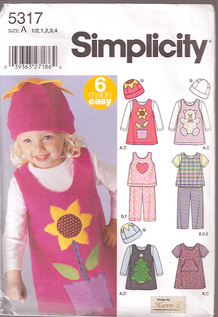
I’m cheating a little because I already blogged about this when I talked about making this Simplicity T-shirt pattern (Simplicity 5317). I love the look of layered sleeves, and though I wear this look myself, there is something particularly boy about it. It can transform a blah t-shirt into an interesting T-shirt. It’s also a great way to use up little bits of knit fabric. Read about how to do it here. Boy Sewing Brainstorm #2Add an embroidered patch to a t-shirt. Yes, one more T-shirt idea (what can I say? Boys wear a lot of T-shirts). Once again, this is my favorite Simplicity T-shirt pattern, again with faux-layered sleeves. But to individualize this one a bit, I decided to make a special “All-Star” patch. Instead of using a font and printing it out, I wrote it out myself (because I wanted a genuinely handwritten look) and drew the little star (unevenness adds character, after all). I transferred it using embroidery transfer paper (I used DMC brand, but will use some from Sublime Stitching next time). 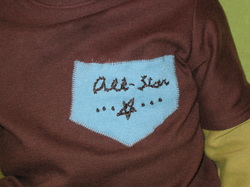 Then, I embroidered it, using a simple split stitch, and added the French knots on each side. (I think I’ll invest in some of Sublime’s Stitching’s T-shirt stabilizer next time though, because I found it challenging to embroider on knit and didn't do the best job with my stitches.) I put some TrueGrid over top the finished embroidery and cut it in the shape of a pentagon and then cut out my patch. I just used a machine applique stitch to attach.If you come across great boy sewing ideas (which are certainly out there--I'm in the process of collecting them myself), feel free to leave a comment and link and I'll repost.
Okay, so this picture of my little Georgia really has nothing to do with this post, but it's so cute, I can't resist!Now that 2010 is coming to a close, I'm ready to start thinking about 2011 and where I want to take my business, as well as this blog. Some writer friends of mine have been discussing our Wildly Improbable Goals for 2011 (I believe life coach Martha Beck has coined this phrase). I think my WIG for 2011 is to launch a line of patterns. Having this as my WIG helps me focus my efforts a little better, and understand what skills I need to work on. For the first time in a while, I'm excited about the possibilities (instead of being bummed out by the limitations of the freelance writing industry).As part of that, I want to keep providing insightful and helpful blog content. Here are just a few things I have planned for 2011 (both specific and general):- A Q&A and giveaway with Anna Maria Horner (coming very soon!)
- More Q&As and giveaways with designers (I love doing Q&As because I get to ask people I admire all kinds of questions I'm dying to know!)
- A roundup of good places to find ideas for sewing for boys (working on this now).
- More free pattern downloads and tutorials, particularly in the area of toddler boys' clothing/accessories, such as the toddler apron pattern I just developed. I'm seeing a real hole in the industry here (as I work on the above-mentioned roundup). And since I have a toddler boy, I want to do my part to fill that hole! My next goal is developing a good toddler fleece vest pattern.
- More book/pattern reviews.
- More advice and tips about craft book publishing.
- More discussions about the history/evolution of sewing and how that history is still impacting the lives of women and our decisions and opportunities.
I feel good about 2011, and I hope you do, too. Happy New Year!
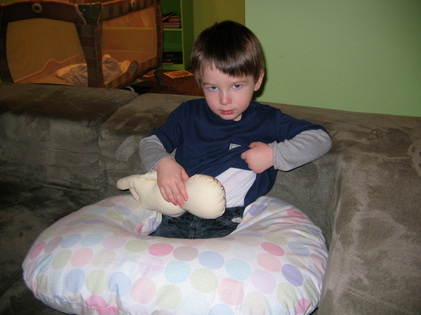
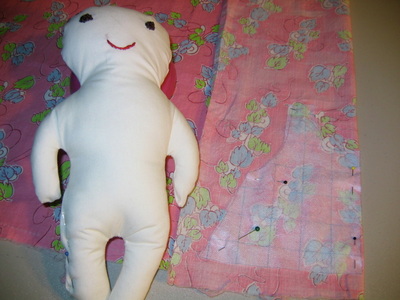
When I was expecting Georgia, I made this doll (from Anna Maria Horner’s Handmade Beginnings) for Max—to "practice" being a big brother. He didn’t pay much attention to it at the time, but in the last few weeks, he has had a renewed interest in it. He loves to imitate everything I do, including “nursing” (as shown above!) his baby, changing her diaper (he insists on getting a wipe), swaddling her, and putting her down for a nap. For Christmas, I decided to make another baby doll to give to my niece, who is about to turn one-year-old. Max doesn’t seem to be interested in dressing his baby, but I thought it would be nice to make a dress for the gifted baby doll. Creating the pattern for the dress was . . . interesting! 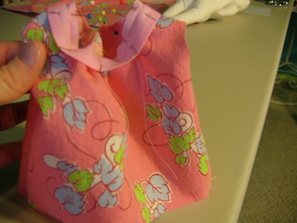 At first, I thought there was no way it was going to work. But slowly, it started to come together, tiny gathering stitches and ruffles and neck binding and all.
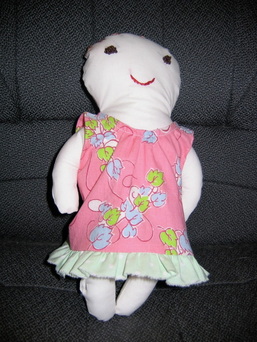 And now, Dolly has her very own dress, made from a vintage feed sack (got it on eBay for $3). I could offer a tutorial (and my make-do pattern piece) if people are interested? But it’s a pretty specific thing, and first people would have to make the doll from Anna Maria’s book (which I’ve written about before, and seriously cannot recommend enough!). I’d do it if I thought there was any interest. Drop me a line if you want the pattern!
Here is it, my list of grievances against life on this cold December afternoon:
1. I cannot get Georgia to sleep through the night. Yes, she is only 3 months old, but Max was sleeping through consistently after about 6 weeks. She wakes at 3 am and then at 5 or 6 am and then for good at 8 or 9 am. I feel that I will never get a full night’s sleep again. Ever.
2. Max, 2.5 years old, has taken to crying and whimpering every single night when we put him to bed. He never had a single sleeping issue until about a month ago. He lies in front of the door, whimpering, “I need anodah hug and anodah kiss from daddy” over and over again. And then sometimes he just screams. We usually go back in at least once to check on him, but it doesn’t do any good. Eventually, he falls asleep on the ground in front of the door and one of us has to slink back in, lift him off the floor and back into his bed.
3. Bedtime now sucks.
4. The magazine industry sucks too. A great majority of my regular magazine work has dried up in the last year or so because of factors completely out of my control.
5. I have 10 lbs of baby weight and I can’t lose it. Every time I look down at my stomach (once flat and toned), I want to cry.
6. I’ve been sick with sinus crap on and off for the last month and it’s screwing with my motivation to exercise and lose the above-mentioned baby weight. I haven’t had a consistent week of good running in forever. And every night I want to eat cookies. Probably because bedtime now sucks.
7. It’s freaking cold out. I hate winter coats. I hate cold cars. I hate snow.
8. We’re now starting to get Christmas cards from people. Don’t get me wrong, I love the cute pictures of people’s families and I want to get cards from them. But it only reminds me that I totally suck because I am not doing cards this year. Even with a new baby and a toddler who would look adorable in some sort of holiday shot. It’s just too much to deal with.
9. I have a work-related trip in January. I’ll be gone two nights and almost three whole days and I can’t see how I am ever going to pump enough milk (while still nursing Georgia) to have a supply here. I’m afraid my goal of 6 months exclusive nursing is not going to happen this time. I’ll be disappointed in myself. My husband will be disappointed in me. The La Leche League will probably come and take away my breastfeeding card.
10. I know lots of people have much bigger problems (famines, floods, warlords, abusive relationships . . .) than any of these things and I feel guilty for venting about these stupid problems and I realize that I have no perspective at the moment. But it’s cold, I’m tired, the economy sucks, the cat is meowing too much, the toddler is grabbing ornaments off the tree every five minutes and I’m going to whine about it for a little bit.
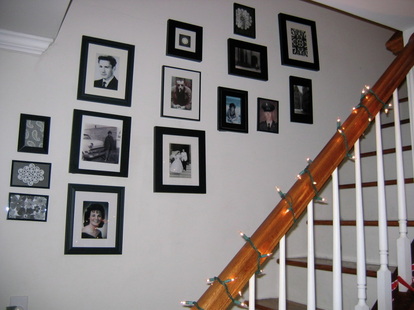
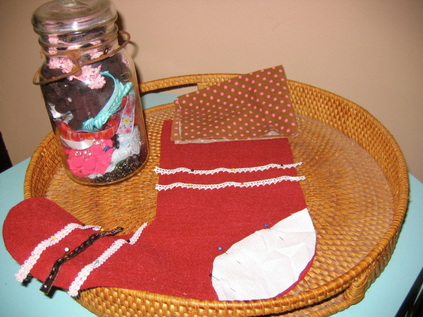
When I was contemplating having a second baby, one of the random, silly thoughts that went through my mind was: “But we only have room to hang THREE stockings from the shelf! Where will the fourth go?” Okay, so ultimately it wasn’t a deal-breaker. I mean, if paying out of pocket because insurance for self-employed people doesn’t cover maternity (yes, I’m serious, and no, I don’t know why this is even legal) isn’t a deal-breaker, a little piece of decorated felt shouldn’t be, right? But I digress . . . 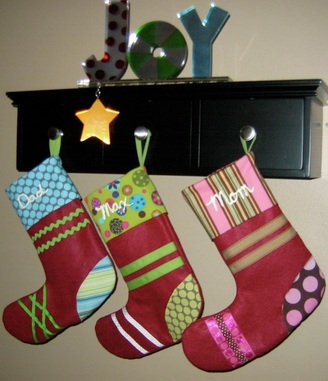 Only 3 knobs! What to do? Okay, so this year with my new family of four, I actually DID have to think about where to put our stockings. I definitely wanted all four to hang side-by-side. I settled on the steps, which turned out to be perfect since the wall behind holds my prized collection of black and white photos of my parents and my husband's parents. 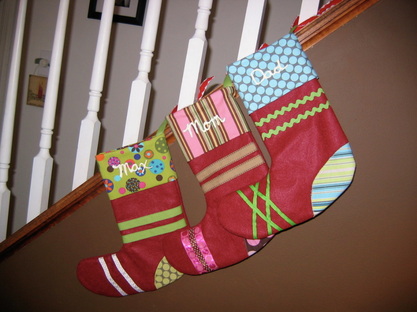 New home on the stairs But now I have to actually make little Georgia’s stocking. At first, I wanted it to be sooo ridiculously pink and girly because, hey, I have a girl now! But then I restrained myself—a little. I’m working on sewing the trim on as we speak . . . 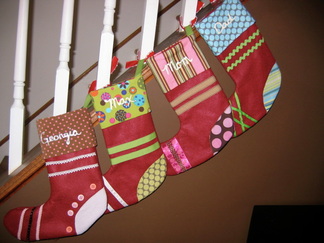 And now I'm finished! Four just has better symmetry than three!
I’ve loved making these stockings for all of us. It’s an amazingly simple pattern, and you can embellish the front in any creative, crazy, or traditional way you want. I just added it as a Bonus Project on the site and you can find it right here (including the templates, which you can download as a PDF).
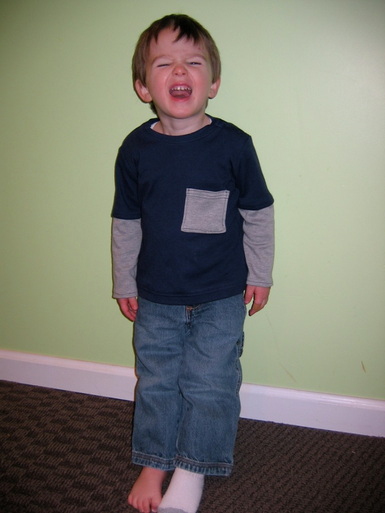
So I’ve been searching for the perfect toddler T-shirt pattern for a while. I’ve tried making my own, and I never get the neck proportion right. I also tried sizing down a larger kids’ pattern to fix my Max (who is almost two-and-a-half). But the results were less than great.
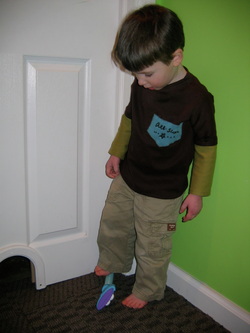
Finally, I’ve found my go-to T-shirt pattern and I love it! It’s Simplicity 5317, and though the main draw of the pattern is probably the cute jumper, the T-shirt is just right for what I need. I first made the shirt for Max’s SuperWhy! costume for Halloween, which I wrote about here. But now I’m making him some versions (without the fancy SuperWhy! logo) that he can wear to preschool or around the house. Here is my first attempt (and don't ask me where his other sock is). I think my problem with my own pattern attempts was that I was making the neckband too wide, and not under-stitching the right way. (This pattern leads you through how to under-stitch, if you don’t know what I’m talking about, though I don’t think it calls it that.)
For this version, I decided to do faux layered sleeves, since that seemed to add a good “boy” element. It’s very simple to do: I just folded the sleeve pattern piece at the line where it says to cut for short sleeves, and added a half-inch at the bottom for the hem. I cut two sleeves (from the main fabric) using that. Then I re-folded the sleeve pattern piece so that I was cutting just the bottom part of the sleeve, and I added about a half-inch at the top for the seam. I cut two sleeve bottoms out of my contrast (grey) fabric. To make the sleeve: I folded the bottom edge of the top sleeve piece under 1/2” and pressed. Then I placed the top raw edge of the bottom contrast piece flush with the top raw edge of the fold on the wrong side and stitched it. That way, you’re hemming the top part of the sleeve and attaching the bottom part in just one step.
I also added a pocket—just a basic 3 – 1/2” square, top-stitched all around, with multiple lines of top-stitching in contrasting thread (I actually didn’t do that great of a job keeping these lines perfectly straight). I was considering getting rid of the snaps on the shoulder because the neck hole seemed large enough, but then I realized that the snaps would prevent the neck from getting stretched out. Oh, I also had to add length to the bottom of the shirt—about two inches. (I still took a 1 – 1/4” hem.)
I used Jo-Ann’s Sew Classic Knit fabric (I think this is it), which I love because it’s super soft, but not so flimsy as to be difficult to work with. They often run it 40% or 50% off. If you want more info on finding knits, check out Meg’s excellent post on knits at Sew Liberated.
I’ve got more knits and more T-shirt customizing ideas. Next up: creating stripes!
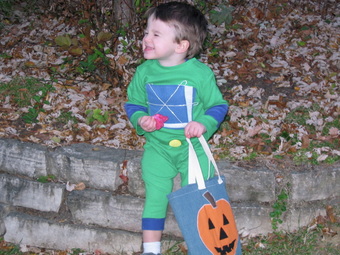
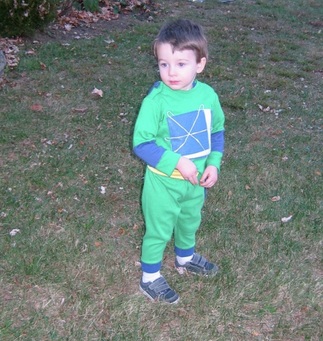 My own little super reader. 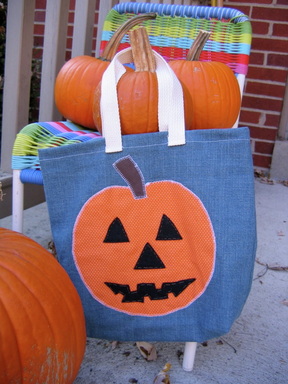 Easy pumpkin applique bag I've never been one much for Halloween (I loved it as a kid, but as an adult, I've never gotten that into it). But it was fun to see Max sort-of understand what Halloween was this year. Of course, after we put on his costume and went outside, it took me 10 minutes to convince him to get off the swing-set and go trick-or-treating. But once he got the hang of (and saw candy bars getting dropped into his bag), he was into it.I'm happy with how the SuperWhy costume turned out, except the mask (which I couldn't even get him to wear anyway). And as an added bonus, while searching for inspiration for the various parts of the costume I discovered a T-shirt pattern (Simplicity 5317) that I really love and will definitely use again (sans cape and SuperWhy logo). I've been struggling to find a good T-shirt pattern for Max all summer (my own attempts to draft one from existing shirts never worked, and the few patterns I tried weren't quite right in the neck). But I love how this one fits. I also whipped up a fun pumpkin trick-or-treat bag (made from denim, with orange pin dots for the pumpkin and craft felt for the face). It reminded me that sometimes it's okay to just make a cute little bag without lining or finished seams or fancy details.
So I've declared tomorrow the start of my baby-weight-reduction plan. But the bowl of leftover candy begs to differ . . .
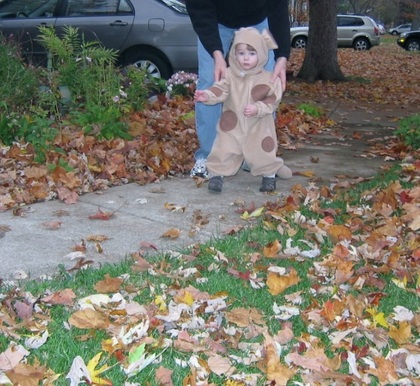
For the last several weeks, Max and I have been talking about what he is going to be for Halloween. Last year, I made him a doggy costume (Butterick 6695) which was a big hit, although getting him to stand still for five seconds to admire his doggy cuteness (or even take a picture) was challenging. 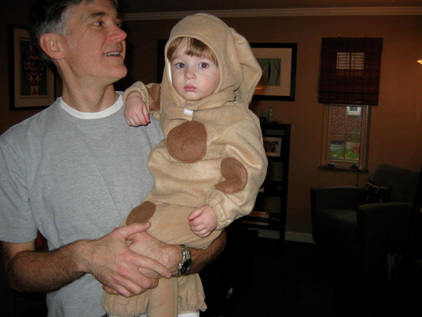 Daddy holding the wild doggy This year, he was sort of enamored of the idea of a ghost (since Clifford was a ghost in the Clifford Halloween book). And that would have been an easy costume. We were almost going to do that, until I struck on the idea of him being Wyatt the Super Reader, from his favorite show, SuperWhy! (on PBS). He talks about SuperWhy! non-stop (everything is a Super Big Problem) and was immediately smitten. We gathered supplies for his costume yesterday at Jo-Ann’s (along with the 16,000 other parents there buying supplies for Halloween costumes). I don’t have any sort of pattern, but I’m pretty sure I can pull it off. I already have some green jammy pants I made a few months ago that are going to serve as the bottom, and then I’ll make a close-fitting green T-shirt for the top. I’m skipping the blue briefs, and just making a yellow belt. I’ll have to fake the eye mask a little. I bought some fabric sheets that can run through my printer (and then fuse to fabric) to create and fuse the SuperWhy! logo. I’ve never tried using the printable fabric sheets, so we’ll see. But if nothing else, I’m pretty sure no other kid out there will have the same costume! Georgia, in all her baby portliness, would make a great pumpkin. But I have a feeling I’m going to wimp out this year on that. I barely have time to tie my shoes before I go out the door, so I’m guessing that making two Halloween costumes just isn’t going to happen. I’ll make her something really special next year though, when she actually has a clue what’s going on. Let the costume-making begin!
|


 RSS Feed